Monday, June 30, 2014

Exfoliating Coffee Cubes for Stretchmarks & Cellulite. ~ All Natural Remedy

While I feel we should completely embrace our 'Warrior Mama Marks', it's perfectly natural to want to smooth them out. This remedy will help do just that.


[caption id="attachment_433" align="aligncenter" width="640"]Coffee Cubes for Stretchmarks & Cellulite Coffee Cubes for Stretchmarks & Cellulite[/caption]

The caffeine in coffee helps to stimulate blood circulation to the affected area so the healing process can begin. Honey is also known for helping to reduce stretchmarks and cellulite by removing toxins from the affected areas. (Vegan alternatives included) As we already know Coconut oil is a wonder substance that is amazing at healing anything & everything! (You can read my top 50+ favorite uses for Coconut Oil here) Aloe Vera is well known for many similar healing purposes, as well as the other oils used in this recipe. (You can look up their full descriptions, or make a purchase on Mountain Rose Herbs from clicking each ingredient.)

You could also make this recipe on it's own as a regular scrub, I just think the cubes are a more practical (& fun) way to use a scrub. These will also keep longer than a traditional scrub as we keep them in the freezer! <3

What You'll Need:


  • 4 (or so) generous tbs Coffee grounds. (I find it's best to use the ones in your brewer after you brew a pot)

  • 1tsb Shea Butter or Cocoa Butter

  • 1tbs Sweet Almond / Jojoba or Calendula Oil

  • 5 tbs Coconut Oil

  • 1-2 tbs Sugar (I just used white sugar)

  • 5 drops Lavender Oil (optional)

  • 1 drop of Peppermint oil (optional)

  • 1tsp of Chamomile (optional)

  • 1 tsp Aloe Vera (This was exciting for me, as I got to harvest some from my own plant for the first time.)

  • 1 tbs Organic Honey (Raw) (optional) a Vegan alternative is Agave Nectar.

  • 1 tsp Beeswax or 1/2 tsp Carnauba Wax - (Carnauba is a vegan alternative to Beeswax, it is extracted from the leaves of Brazilian palm trees BUT no trees are cut down in order to collect. You can read more about it from the link) Used here as a thickening agent for more of a lotion bar feel to the scrub.-  (*Optional - If you do leave out, maybe add a wee bit more coconut oil)

  • 1 tsp of Vanilla Extract. (optional, it just smells amazing!)

  • silicone ice cube tray or mold (I used these cute Heart ones)

  • Storage Jar (Mason Jar, a cleaned out old candle jar, etc)

  • Double Boiler, Melting Pot, (Pot on stove set to low also works, even a slow cooker)

  • Stir sticks, spoons.


Alternatively these can be made with just equal parts Coconut Oil & Coffee grounds for those of you that prefer simpler recipes. I just like to add in some extra nourishing benefits.

Directions:


  • Melt your Beeswax (or Carnauba Wax) first. Stirring often. *NOTE* Carnauba Wax requires a temperature of 180-185 degrees in order to melt.  Carnauba Wax takes longer to melt than beeswax.

  • mix in and melt Shea Butter (or  Cocoa Butter)

  • Add in and mix all other ingredients (except for essential oils)

  • Once everything is completely mixed, remove from heat and add in essential oils if you're using them.


** Be sure that all ingredients are mostly level, meaning there isn't a thick layer of oils on the top of the mixture or else you'll end up with coffee chunks on the top and cream on the bottom. The Coffee & herbs will settle on the bottom, thus creating ugly and inconsistent cubes. I learned this the hard way on my first try, as you can see from my original image:

[caption id="attachment_429" align="aligncenter" width="300"]Coffee Exfoliating Cubes for Cellulite & Stretchmarks Recipe Fail![/caption]

Not so pretty Right?! :/


I actually ended up remaking these 3 times before I found a good mix. (If yours don't turn out the first time, you can just melt the mixture back down and try again.)


Sooo, if you have oils settling on the top of your mixture just add in more coffee grounds until it's a uniform consistency so you don't end up with cubes like those. ;)


  • Scoop with a spoon or poor into your molds.

    [caption id="attachment_424" align="alignright" width="217"]Heart Molds - Cellulite / Stretchmark Cubes Cute Heart Molds - From my Mama.[/caption]


(You may want to rub some Extra Virgin Olive Oil around the molds for easy release)

  • Pop into freezer until they solidify. (I left mine in overnight)

  • once they have hardened you can put them in your storage jar (or Ziploc baggy) & keep them in the freezer. (so they don't melt & they stay fresh for longer)


To Use:


Take a cube with you when you're having a shower and use as an exfoliating massage / lotion bar. A bit of warm water helps to massage into stretch marks and cellulite more gently. Rub in circular motions, moving toward the heart.

Leave on your skin for a few minutes before you rinse off to soak in as much of the nourishing benefits as you can. I leave mine on for about 10 minutes if I have time.

You may want to put a drain screen in so you don't risk clogging your drain.

These may be best to use in the morning or daytime for those of you that are sensitive to caffeine. ;)

These also make a fabulous face scrub! They go along perfectly with our Coffee Tired Eyes Cream.


HAPPY EXFOLIATING! <3

I recommend Mountain Rose Herbs for all of your herbal healing needs!
Images Edited using PicMonkey. Some of the links here are affiliate sites. It would also help me out a lot if you purchased your supplies through these links. ;) & Please also see my disclaimer. Thanks Friends.

Saturday, June 28, 2014

Natural Preservatives for your Natural Products & Shelf Life Information.

Please Please PLEASE do your research when it comes to adding preservatives to your all natural beauty products! Don't just go by one article. Research ingredients, ALL of them before choosing what to use.

[caption id="attachment_376" align="aligncenter" width="366"]Natural Preservatives for your all natural skin care products Original Image by: http://stockproject1.deviantart.com/[/caption]

As we know, because the products here are made from all natural ingredients, their shelf lives are much shorter due to the lack of nasty chemicals. I would much prefer keeping my product batches small and refrigerated than buy chemical enhanced products any day!

Did you know, it takes only 26 seconds for the chemicals in most store bought products to enter your bloodstream? I say most because many of them are switching to organic based ingredients. BUT at the same time, many product lines are masquerading around claiming to be all natural and are adding in harmful parabins, SLS, (Sodium laureth sulfate) SLES, (sodium lauryl ether sulfate) etc. PLEASE Check your product ingredients.

All natural products will spoil sooner but that's okay! Organic food spoils sooner than pesticide sprayed food too! I think It's safer to use caution and use all natural  products than it is to use cancer inducing chemical products. If you want to go all natural, just research the risks and shelf life of keeping your products so you can be sure they are safe and fresh for use.

There are so many contradicting articles out there, it's hard to figure out which ones are backed by evidence. I find it's easier to pick apart the ingredient list in any product you are considering to use, and research each one individually.

GERMALL: I see this pop up often as a recommended preservative for all natural products but upon further reading, It states that the DIAZOLIDINYL UREA in Germall works by releasing formaldehyde into the product. Strong evidence suggests it is linked to dermatitis, acts as a skin toxicant or allergen, may be linked with cancer and may be derived from animal products. (In some cases this is considered a parabin)

Base link of information on DIAZOLIDINYL UREA

Here is a link from skincaretalk.com about avoiding germall

SOME NATURAL OPTIONS:


Organic Lecithin Powder OR Lecithin Powder (there is also a liquid version on the site)


Lecithin is a waxy like ingredient derived from soybeans. It acts as an emulsifier and thickening agent for both food and cosmetic products and improves a products shelf life by acting as a mild preservative. A valuable ingredient for cosmetic creams, lotions and other body delights. - Mountain Rose Herbs

Citric Acid:


Our citric acid comes from the fermentation of crude fruit sugars and is chiefly used to help extend a products shelf life, in retaining a products texture, and guarding against appearance loss. It is also a fabulous base ingredient in bath fizzies and scrubbing salts. Blends easily and fluidly without creating a gritty feeling to the final product. Undeniably, citric acid is a very important ingredient for use in natural body care and cosmetic recipes. Not only does citric acid have many varied applications and uses, but it has also been approved by the FDA and other food regulatory agencies. Furthermore, since citric acid is present in almost every life form, it is consequently easily metabolized and eliminated from the body. Precautions: Direct contact may result in skin and eye irritation if exposed to concentrated solutions of the dry product. - Mountain Rose Herbs. 

Rosemary Antioxidant Extract,


The organic Rosemary antioxidant offered by Mountain Rose Herbs remains the number one choice for the natural preservation of handmade cosmetics, creams, lotions, and other herbal compounds. Its concentrated nature allows you to use sparingly with effective results. Precautions: In regards to all Rosemary products, women who have heavy periods should avoid excessive use of rosemary because it can stimulate menstrual flow. The herb should also not be used medicinally during pregnancy. Small amounts of rosemary used in cooking, however, are safe for pregnant women and for women who have heavy periods.- Mountain Rose Herbs. 

Other Options May Include: Cinnamon, Geranium Essential Oil, Goldenseal root, Grapefruit Seed Extract, Green tea extract, Green tea leaf powder, Potassium Sorbate, Rosemary extract powder, Vitamin E T-50 Mixed Tocopherol Oil.

Standard Shelf Life guidelines:


  • Mainly 3 - 6 months (kept in the fridge) for most all natural products

  • 4- 6 weeks out of the refrigerator.

  • Products containing food should be kept for only a week, in the fridge.

  • Products containing water (or where water is introduced - scrubs) should be used up within 1- 2 weeks


(These are just general guidelines I use. Always check for discoloration / scent changes - this is not always evident in every case, though.)

My advice for home made skin care products is to make small batches and keep them in the fridge. Make enough for what you will use for the week. If you are adding natural antioxidants or preservatives, make what you will use in a month but still try to keep refrigerated. If you can't or don't want to store products in the fridge, store them somewhere cool and dark or designate a tinted container to keep them in. Using jars and bottles that are amber or cobalt will keep them fresher longer. Always use clean / sterilized tools, containers, working surfaces, and hands while making your products. If you are using a product like a scrub where you will have to put wet fingers into, try keeping a plastic spoon or Popsicle stick close by where you can scoop with that instead.

It's not only important to keep your made products refrigerated & safe, you also have to consider your raw materials as well. Herbs, oils, butters, etc.

Guidelines for Raw Materials From Lotion Secrets:
Use your raw materials while they are fresh. Don't let your herbs get stale or your oils go rancid. Use your raw materials within 3 months and give each bottle of lotion no longer than a 3 month shelf life. Dried herbs and cold-pressed, refrigerated oils may last longer. Expeller oils will stay active and fresh no longer than 6 months, even when refrigerated.

Here is a MASSIVE LIST of general guidelines to different carrier oils & Their SHELF LIFE.


Here is another great link on How to preserve and extend the shelf life of your skin, nail and hair care products you make at home.

Here is a list of natural skin care preservatives from skincaretalk.com


(Please read all the user comments in the link's thread as well, many good observations)

Organic Lotion Secrets' Glossary Natural Preservatives / Natural Preservative Chart as well as great conversion & percentage charts!


All I ask is that you do your research before choosing a preservative to add into your skin care products. Don't even go by what you read here, keep researching.

I recommend Mountain Rose Herbs for all of your herbal healing needs!
Images Edited using PicMonkey. Some of the links here are affiliate sites. & Please also see my disclaimer. Thanks Friends.

Let me know what you suggest or use in your products and why?

Phototoxic Essential Oil Safety

What does phototoxic mean?

Phototoxic basically means certain oils become toxic in direct sunlight. When a phototoxic essential oil is left on the skin, and you are exposed to the sun, the harmful effects are increased. (severe sunburn, blisters, swelling & even skin colour change)

Best said by David Fisher from candleandsoap.about.com:
Phototoxicity, sometimes referred to as photo sensitivity, refers to constituents in the essential oil that absorb sunlight intensely...in effect, increasing or focusing the effect of the sun on your skin. It’s a constituent of the essential oil called a furanocoumarin that causes this. (Note: It’s also furanocoumarins that make drinking grapefruit juice problematic with some medicines.)

If these phototoxic essential oils, and/or products containing them, are left on the skin and then exposed to sunlight, they can cause the sun’s effect to be greatly magnified.

This mostly applies to products that are going to stay on the skin - “leave-on” products like lotions, lip balms, perfumes etc. In soaps, in which the product is rinsed off, so little of the essential oil remains behind on the skin that I’ve never heard of it being a problem.

Phototoxic Essential Oil Safety & Information

Which Oils are phototoxic or cause sun sensitivity?

  • Angelica root

  • Bergamot (unless it's specified as "bergaptene-free" or Bergamot FCF)

  • Cassia

  • Cumin

  • Ginger (possibly)

  • Grapefruit

  • Lemon (unless steam distilled)

  • Lime / Lime Peel (unless steam distilled)

  • Orange (unless sweet orange)

  • Tangerine (possibly)

  • Verbena


(This is just a list of research I've been doing, if you have any to add, please let me know.)

Here is another great list by David Fisher of phototoxic & toxic oils to be cautious of.

How can I stay safe when using them in my skin care products?

It is suggested to avoid the sun for approximately 12 hours after applying a 'leave on' product containing phototoxic oils. I only apply any products containing phototoxic oils in the evening or at night before bed.

Here is a great article from Nourishing Treasures about Phototoxicity

Here is another great article called Are Essential Oils Safe?

And another for Essential Oil Safety.

Phototoxicity – How to Stay Safe in the Sun - Here you can also find a few great charts outlining the safety of phototoxic oils and how much they should be diluted!


 Image created using PicMonkey. Some of the links here are affiliate sites. & Please also see my disclaimer. ALWAYS do your own research when using essential oils. Thanks Friends.

Tuesday, June 24, 2014

Make your own ~ 'WAKE UP' Herbal Shower Steam.

Whether you're in need of a pick me up, a wake up boost, or you're feeling groggy - this quick and simple Herbal Steam recipe will come to the rescue. It works wonders for me and I'd love to hear {if you try it} how it works for you! <3

How to make your own Wake Up Herbal Shower Steam!

I see posts about hanging Eucalyptus in the shower to relieve congestion and to clear the air from the steam. Eucalyptus is also known for it's analgesic properties, making it beneficial to pain relief. It's steam is also useful for relieving bug bites and acne.

Orange Oil is good for relieving the blues, 'groggies' or depression. It also acts as a soothing agent to dry or acne prone skin.

Peppermint Oil is widely used for keeping energy high, as well as improving concentration and alertness. (For an extra jump start, put a drop of Peppermint Oil on your tongue & rub some into temples and back of the neck.)

What You'll Need:


I say 5 drops of each but you can experiment to get a stronger (or more diluted) scent.

Put a spoonful of salt into your container to hold the oils. Crush up your eucalyptus leaves if you're using them. Mix together well.

Place in the shower where you can enjoy the scent of the steam. Either at the back of the tub where the water won't hit it too much, on the side of the tub or in a shower rack if you have one.

Once you're done, you can cap it off and save it in the fridge for your next shower. (It's safe to change the mixture after a week because of the herbs.)

Have you got any herbal steams you use in the shower?


I recommend Mountain Rose Herbs for all of your herbal healing needs!
Images Edited using PicMonkey. Some of the links here are affiliate sites. & Please also see my disclaimer. Thanks Friends.

Monday, June 23, 2014

Make Your Own - Hydrating Honey Hair Mask.

IMG_4398x1


This Hydrating Honey Hair mask packs an amazing nourishing punch! I hope you'll enjoy it as much as I have. You'll have to let me know if you try it. I've outlined the benefits of each ingredient below. <3

What You'll Need:


3 tsp - Honey: Honey helps to Shine & Soften, improves Scalp Health, & Promotes Growth.

2 tsp - Coconut Oil: Rich in Vitamins & Minerals, Strengthens Hair, Fights Against Premature Aging, Baldness & Hair Loss. Nourishes Dry Scalp & Dandruff, Repairs Damage & Split Ends, Softens & Adds Shine.

2 tsp -Extra Virgin Olive Oil: Rich in Antioxidants, Stimulates Follicles which can Result in Thicker Strands. Moisturizes, Dandruff Control, Fights DHT Production (Hair Loss)

5 drops -Lavender Oil: Hair Growth, Prevents Hair Loss, Clears up Dandruff, & Psoriasis. Enhances Blood Circulation improving Scalp Health & Hair Re-Growth.

3-5 drops - Peppermint Oil: Stimulates Hair Follicles, Prevents Hair Loss, Promotes Hair Growth, Moisturizes, Reduces Dandruff & Dry Scalp. Helps Regulate & Restore Natural Oil Production.

This recipe makes enough for one application.

  • Soften Coconut Oil in a mixing bowl. Spoon in honey olive oil, & essential oils mix together well.

  • Apply like conditioner to wet / washed hair. Massage into scalp and all throughout strands. You can bring this in the bath or shower with you. Leave on for 5-30 minutes to fully enjoy the nourishing benefits. If you want to leave it on overnight you should wrap your head in a towel or shower cap to avoid getting everything sticky. ^_^ Rinse thoroughly or repeat wash & condition.


*It may be wise to test a small patch on your scalp first as peppermint oil can be spicy. Everyone reacts differently to everything. If it feels like it may sting or burn, dilute more with an extra spoon or two of Olive Oil and use less peppermint oil in the next batch.*

ALSO: please be careful if you're doing this in the bath as it may leave your tub slippery from all the oils.

An extra bonus, after massaging this into your hair, your hands are left feeling extra smooth too!

Also, you can refer to my list on How to choose a Carrier Oil for making a mask for other hair types as this one is generally for normal to dry hair. You may want to swap a few ingredients if you have oily hair.

I recommend Mountain Rose Herbs for all of your herbal healing needs!
Images Edited using PicMonkey. Some of the links here are affiliate sites. & Please also see my disclaimer. Please ALWAYS do your own research before using essential oils. Thanks Friends.

Do you have an all natural hair treatment you like to make? 

Sunday, June 22, 2014

DIY ~ Eucalyptus & Honey Sugar Scrub.

DIY Eucalyptus & Honey Sugar Scrub

I love getting custom orders and sharing them here with you! This one smells amazing!  & after testing it, I can say makes your skin feel like that of a goddess! So invigorating!

What You'll Need


Directions

  • Start by grinding the eucalyptus leaves into a fine powder. (I find if you're using a mortar and pestle adding a few spoonfuls of sugar helps to break the leaves up easier)

  • Combine dry ingredients in a mixing bowl.

  • Melt together Shea butter & Coconut oil,

  • Add in vitamin e, grape seed & honey to the melting pot (& eucalyptus oil if you aren't using the leaves) stir together well.

  • Poor the oils into the dry ingredients and combine together. (A fork works best here)

  • Spoon your ready mixture into your storage jars & it's ready to be enjoyed!

  • Take into the shower with you, applying to already wet skin works much easier. Gently massage into skin in circular motions.

  • You can leave the mixture on for a few minutes to allow the extra benefits to soak in. Rinse and feel your silky smooth skin!


IMG_4385xx1

Eucalyptus has many health benefits such as relieving muscle & joint pain, relieving respiratory problems, & helping to provide mental alertness. It also has antiseptic, antibacterial, anti-inflammatory & analgesic properties.

There are fantastic articles HEREHERE outlining some of the amazing properties eucalyptus has to offer.

I recommend Mountain Rose Herbs for all of your herbal healing needs!
Images Edited using PicMonkey. Some of the links here are affiliate sites. & Please also see my disclaimer. Thanks Friends.

Saturday, June 21, 2014

Herbal Baby ~ All Natural Product Options for your Littles.

I just wanted to let you all know that Mountain Rose Herbs offers an amazing selection of all natural Children & Baby Products.


babies-and-children-8acbecffaec0cc1f74fab1f502e6355a
Your little one’s delicate skin needs the gentlest care possible. That’s why all of the baby care products offered by Mountain Rose Herbs contain no synthetic ingredients or chemicals and are made exclusively with natural, botanical, and vegetable based ingredients. We’ve collected the mildest, purest skin care products we could find, formulated especially for the skin of babies and small children.

All of the gentle baby care delights offered by Mountain Rose Herbs are of earth origin and made exclusively with natural, botanical, renewable or vegetable based sources. Soft, gentle and without compromise to the environment, we are sure that you will find a plethora of products kissed with botanical goodness and designed specifically with the (baby) naturalist in mind.

Beautiful all natural product options such as Aloe Baby Wash, lotion, shampoo, oils, balms & even a herbal bath blend.


You can find their selection of baby and children product options by clicking HERE.


I also recommend checking out Earth Mama Angel Baby for more amazing all natural baby needs. <3


http://www.shareasale.com/image/22557/468x60ToxinsM.jpg

Bug Bite Itch Relief ~ Calamine Alternative


This is a simple recipe to quickly relieve the itchiness of big bites. {It looks gross, but it works!}

What You'll Need 20140620-092444-33884816.jpg


Basil has anti-inflammatory properties that will reduce swelling while peppermint is soothing and cooling to the skin. Tea tree is antiseptic and will prevent the bite from getting infected as well as help with the healing process.

Aloe always works wonders as well.

Directions

  • Crush your herbs into a fine powder using your mortar and pestle or coffee grinder.

  • Mix dry ingredients together first. (Herbs, Salt, Clay or Baking Soda.)

  • Add in your peppermint and tea tree oils

  • Mix together well (I use a chop stick for this)


It should now look like this:

Slowly and carefully add a few drops of water or witch hazel, mixing constantly until the mixture forms a thick paste.
Store in an airtight container in the refrigerator for extra soothing / cooling effects.

Let me know how this works for you!

Here is a SUPER list of 15 Home Remedies for Bug Bites & Stings! 

I recommend Mountain Rose Herbs for all of your herbal healing needs!

Images Edited using PicMonkey. Some of the links here are affiliate sites. & Please also see my disclaimer. Thanks Friends.

What is your best recipe or trick for relieving big bite itchiness?


Happy Healing!

Monday, June 16, 2014

Make Your Own ~ Coffee "Tired Eyes" Cream.

The Caffeine in Coffee is known to reduce puffy eyes and under eye dark circles. This recipe also calls for Coconut oil, which will reduce fine lines and wrinkles.

You can infuse your own coffee oil to make this salve. I've got some info on infusing your own oils HERE. I used fresh ground coffee to make my oil or you can also make it from the used grounds after making a pot of coffee. (it's best to use Organic Fair Trade Coffee if possible)


What You'll Need:

Equal Parts

(I used 1/3 cup of each)

You could also use a few drops of your favorite essential oil to scent. I put one drop of peppermint in mine and it smells much nicer than just the coffee alone. Vanilla would also be really nice.

Melt Beeswax in your melting pot or double boiler first, (& shea butter if you're using) then add in your Coconut, Coffee, Vitamin E oils. Stirring constantly. Once everything is combined remove from heat and add in a few drops of your essential oil if you're using any. Stir well and pour into your storage container of choice.

Allow to cool or pop into the fridge to speed the process & enjoy! (I find it's most refreshing when kept in the refrigerator. It will also keep longer kept in the fridge. )

This actually works wonderfully on stretchmarks as well. You can check out our post on Exfoliating Coffee Cubes for another remedy.

Happy Healing ~ <3

Calendula Coffee Cream for Tired Eyes

The Herbal Healing Mama


If you're using these as gifts, (or for yourself) feel free to print out and use one of the labels below. You can also check out the post on creating labels to make your own. <3

HHM TIRED EYES CREAM LABEL HHM TIRED EYES LABEL

This is also available for purchase at The Herbal Healing Mama on Storenvy.

Let me know if you've made a similar cream, or if you try this one. Did you add in different essential oils to scent? How do you like it?

 Image Edited using PicMonkey. Some of the links here are affiliate sites. & please also check out my disclaimer. Thanks Friends.

Saturday, June 14, 2014

Make Your Own - All Natural ~ Aromatic Room Fresheners


Here is a great all natural way to fill your home with a luxurious aroma, whilst adding a beautiful looking touch to your decor or table's centerpiece. This method can be used to replace scented wax tarts for a fraction of the cost. So many different scent options are already waiting for you in your kitchen.

I actually use a fondu pot with a tea light underneath to enjoy these scents, ( If you don't already have one, you can probably find one pretty cheap at a local second hand shop) You can also put the mixtures in a pan and on your stove and let it simmer on low heat there or use a wax burner if the bowl is deep enough. (although I would recommend the fondu pot)

What you'll need to get started:

  • A burner of sorts (fondu pot, wax burner, tea light candles, or a pan on the stove)

  • water as the base

  • fruit, herbs, extracts or oils


There are so many scent options. I'd love to hear what you mix and match to make your favorite scents.

A few of my favorites are:

Orange Creamsicle - Yes! It smells just like an orange creamsicle!

  • Half a sliced up orange (or as much of the orange that will fit in what you're using )

  • 1tsp Vanilla Extract or a few drops of Vanilla Essential Oil


Apple Cinnamon

Chocolate Peppermint

  • Chocolate Mint Leaves

  • 1tsp of Peppermint Extract or a few drops of Peppermint Oil


Some things you could try:

  • Extracts - Peppermint, Vanilla, Almond, Coconut, Maple

  • Your favorite Essential Oils

  • Pine Needles

  • Cedar twigs

  • Bay Leaves

  • Lavender Buds

  • Star Anise

  • Cinnamon Sticks

  • Mint Leaf

  • Cloves

  • Sprigs of Rosemary

  • Eucalyptus

  • Ginger

  • Limes, Lemons, Oranges, Apples,

  • Possibly even your favorite tea bags (Chai, Earl Grey etc)


Options are pretty limitless.

Once you've chosen your scent items, fill your burner with water and add in herbs, spices, extracts or oils, light your candle and enjoy the aroma.

Once you're done burning, you can add the mixture to a jar and store in the refrigerator for up to a week or so, to be reused. These could also make a cute gift idea.

Mountain Rose Herbs has a wonderful supply of herbs and oils perfect for this project.

Have you tried this? What is your favorite mix?


 Image Edited using PicMonkey. Some of the links here are affiliate sites. & Please also see my disclaimer. Thanks Friends.

Friday, June 13, 2014

DIY - All Natural {Heavy Duty} Bug Repellent Spray!

With Summer fast approaching, the bugs are swarming in! Especially where we are, by the lake. I definitely love summer, but could do without all the bug bites. I love some of the unique ideas online such as Wellness Mama's Solid Bug-Off Lotion Bars.

There are many different ways to make all natural bug repellent but I really like using some herbs rather than just oils alone. I feel that too much oil base would probably stain clothes, so I guess if you wanted to make an oil mix it would be best as just a skin lotion or even to make the lotion bars above. SO - I will make a list below of the herbs or oils that are effective at keeping bugs away and you can decide which of what you want to use. ( You may already have lots of them in your kitchen)


Play around with different scents, or throw a little of everything in. (that's what I did, using about 2 tsp of each herb, and decided to use Peppermint, Tea Tree and Citronella oil)

Once you decide which herbs you are going to use, follow the directions below.

DIRECTIONS

  • Combine all of your herbal ingredients (excluding the essential oils until later) into a pan (or preferably a crock pot) full of water and let simmer for a few hours. Stirring occasionally.


IMG_4274vThis will reduce in volume. Let it simmer until you have a nice dark base.

  • Once you have the consistency you like, remove from heat and allow to cool for a few hours. (check on temperature)

  • Strain out the herbs using a fine mesh strainer or cheesecloth, keeping the liquid. ( I put a funnel in the top of a mason jar and rested a strainer lined in cheesecloth on the top of the funnel, using a ladle to scoop the mixture into the jar. )


  • Add in your Peppermint, Tea Tree, Citronella and any other oils you will be using from the list.

  • Stir together well, and now you can either use the mixture alone to add to spray bottles or you can dilute into spray bottles with some water. (test the consistency for any skin irritations)


There you have it, All Natural Bug Repellent Spray!

Feel free to print out and use the labels I designed using PicMonkey. (for your own personal use, not for commercial use please)

BUG_OFFBUG OFF PicMonkey Collage1

*Shake well before use & avoid contact with eyes and mouth. I sprayed this all over before taking a walk to the beach this evening and not one single bug stopped to "say hello". ;)

I recommend Mountain Rose Herbs for all of your herbal healing needs! You can purchase all ingredients needed to make this recipe through them.


They also offer an all natural Bug Out Repellent from Way Out Wax. It's Hemp Citronella. (if you don't feel like making your own.)

What all natural methods do you use to repel bugs?

 Images Edited using PicMonkey. Some of the links here are affiliate sites. & Please also see my disclaimer. Thanks Friends.

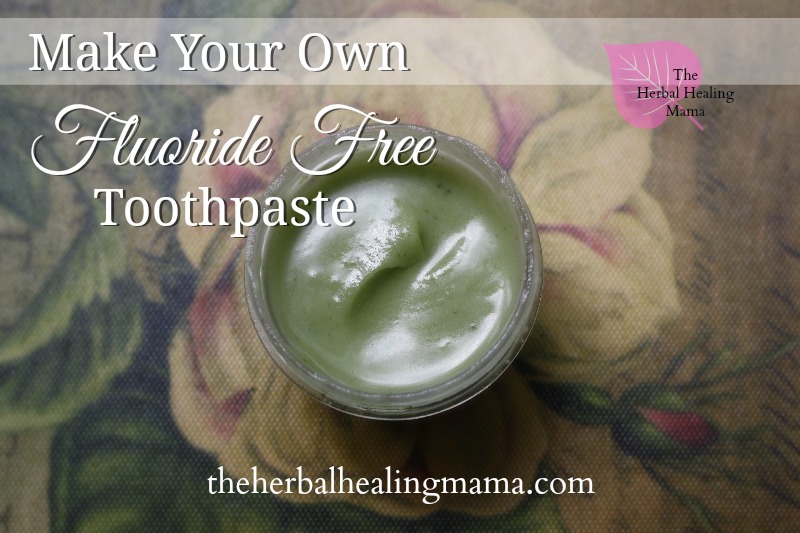
Make your own Fluoride Free Toothpaste!

With the dangers associated with fluoride, I would much rather cut it out of everything all together. I have been using this mixture for a while & thought I would share it here with you!


What You'll Need: photo 1


  • 2 tsp Baking Soda

  • 2 tsp Coconut Oil

  • 10 drops of Peppermint Oil

  • Stevia Leaves or Stevia Powder - I used 5 fresh leaves from my own Stevia plant. (It could use more, as it's still quite bitter. Usually you use 3x the amount of fresh leaves as you would dried.)

  • {Optional} If you have sensitive teeth, You can add in a few drops of Clove oil in, or I actually scoop a little bit of our Clove tooth Pain oil into my mix

  • Mortar & Pestle or Coffee Grinder

  • Storage Container


Directions:


  • Grind up Stevia into a fine liquid (if fresh - which I do prefer) Or fine powder if dry

  • Add in Baking Soda (I added everything right into the mortar & Pestle as it was easier to keep all of the stevia that way. photo 3

  • Soften Coconut Oil & Stir that in with a fork.

  • Finally Add in 10 drops of Peppermint Oil (If you like Minty Toothpaste) You could swap the Peppermint for Cinnamon, Lemon, or whatever your heart desires. If you have sensitive teeth, adding a few drops of Clove oil would be beneficial. (Just be certain that it is 100% pure, you don't want to be adding perfume oils into your toothpaste.)

  • Stir everything together well & scoop into your container of choice. I chose one I can dip my toothbrush into but you could also try this in a squeeze bottle.


**Because of the fresh stevia leaves, it's a safe bet to discard the mixture after a month. Keeping it in a cool dark place will keep the mixture fresh longer but don't make more than what you'll use in approximately 30 days. If any discoloration begins to form, discard immediately & start with a fresh batch. You can also check out my post about preservatives for general guidelines to all natural products' shelf life.

I've also updated my teeth care regiment by adding a post on oil brushing.

HAPPY BRUSHING! ~ Have you got any all natural toothpaste recipes? I'd love for you to share them here!

Image Edited using PicMonkey. Some of the links here are affiliate sites. & Please also see my disclaimer. Thanks Friends.

Thursday, June 12, 2014

Make Dad All Natural Beard Oil For Father's Day!

With Father's Day fast approaching I wanted to create something unique and all natural for all the dads and dad friends we have in our life. Something that my 9 year old son could help with, so something not too difficult to make.

We went hunting on the net for some all natural gift giving ideas for men & came up with our own special recipe after taking in some inspiration from all the lovely ideas we found.

The recipe we used was quite enormous because of the amount of dad's we wanted to give gifts to, but I will put a basic one bottle recipe down here.

We actually found these bottles at our local Dollarama in a travel pack of bottles and things. They came with 2 in each case for $1 !!

What You'll Need:

  • Your choice of Carrier Oil (Sweet Almond, Extra Virgin Olive Oil, Grape Seed Oil, Hemp Seed Oil, etc Or a mix and match of whatever you prefer) This will be your base, so measure out how much you will need to *nearly* fill whatever size container you are using. We had 80ml containers so we used about 50ml or so. (You can top up later if you need to)

  • 1 or 2 tsp of Coconut Oil

  • 1 tsp Shea Butter or Jojoba Oil (optional - this will just add an extra boost of moisturizing nourishment)

  • 1tsp Grape Seed Oil (Optional)

  • 1tsp Vitamin E Oil (Optional - this will help preserve the oil longer as well as add some more healing properties)

  • Melting Pot / Double Boiler

  • Measuring Cups or spoons, a funnel, a mixing stick.

  • Containers of choice. (Either a pour spout, roll on, or one with a dropper.)

  • Essential Oils - mix and match your favorites to add a manly scent.


Essential Oil Blend we used:

This smells divine! (If you are looking for other manly scent ideas there is a great list HERE and also HERE)

DIRECTIONS

I use a melting pot to combine ingredients, but you can also use a double boiler. (Place mason jar full of ingredients into a pan partially filled with water *being careful not to get water into your mixture* turn stove on low heat an stir until combined)

Measure out and add all oils except essential oils.

Stir ingredients together until everything has melted and combined.

Once your ingredients have melted together, Remove from heat & add your choice of essential oils. Stir them in well.

That's It!

Let the mixture cool before filling your container. I used a funnel to easily fill the jars without making a mess.

TAH-DAH! Handmade All Natural Beard Oil for Dad!


I designed some labels on Picmonkey that you are welcome to print out and use. (For your own personal use, no commercial use please) I printed out the collage of them on half a sheet of 8.5 x11 paper. You may have to play around with different sizes to find one that fits your bottle or jar just right!

Click the image & then right click and hit 'save as' to save a copy to your computer.

Beard Oil LabelBeard Oil Labels

Happy Crafting! What all natural items did you make Dad for father's day?

Doterra has an awesome post: 5 Father's Day Gift Ideas, Using Essential Oils be sure to check it out!

I recommend Mountain Rose Herbs for all of your herbal healing needs!


Images Edited using PicMonkey. Some of the links here are affiliate sites. & Please also see my disclaimer. Thanks Friends.

Wednesday, June 11, 2014

The Herbal Healing Mama blog HAS MOVED!

Hi Everyone! Just a quick note to let you all know The Herbal Healing Mama blog has moved! I am so pleased to announced that I now have my very own domain site for the blog! I will probably end up un-publishing this one as there is no need for two, but before I do, I want you all to be able to find me!!

Here is the link to the new site: http://theherbalhealingmama.com/

And if you haven't already, you can find The Herbal Healing Mama on Facebook HERE

Thanks so much Friends & Happy Herbal Healing! <3

How to make your own All Natural Exfoliating Sugar Scrub!


This recipe has made my skin feel amazing! So many benefits packed into one little jar! ^_^ Not only does this scrub nourish your face (or body) with moisture, it helps to heal up any dry skin issues, redness and acne too!

There are so many variations of different face and body scrubs, which I will be sure to share more recipes, but in the meantime - This is definitely one of my favourites!

For this recipe you will need:

  • Mixing bowl or mason jar

  • 2oz jar or container (you can purchase great ones HERE)

  • 2 or 3 tbs of brown sugar (raw is my favourite)

  • 1 tbs honey

  • 1tbs Coconut Oil

  • a few drops of lemon (or Lemon Oil) (because citrus blends are phototoxic it is recommended to use this scrub in the evening or before bed, when you won't be exposed to the sun.)

  • 2 drops of Tea Tree Oil

  • 2 drops of Lavender Oil


I made this recipe to fit in a 2oz jar, you can take away or add ingredients to fit into whatever container you will be storing this in.

1. Add your sugar first to your mixing bowl. (I of course went straight to the container and made a mess trying to keep it contained)


2. Add in your spoonful of honey.


3. Next add in your Coconut Oil (I ended up doing this the hard way. It would make much more sense to melt the coconut oil before you add it to the scrub.)


4. Add in your lemon, Lavender & Tea Tree Oils


5. Now if you were smart and melted your coconut oil ahead of time, you can ignore this step. If you pulled a move like me, then carry on to this step to combine all of the ingredients.


Using a double boiler method, put a wee bit of water in a small pan. (not enough to seep into the jar) Place the jar in the pan and on low heat allow the mixture to melt together. Stirring constantly. (I know some people say to do this in the microwave for a few seconds, while I agree that would be faster, I just don't think it's healthy.)


Once your ingredients are combined & put in your container you are ready to make your skin silky smooth! ^_^

Directions for use:

  • Splash your face with warm water.

  • Scoop a chunk of the scrub into your hand. With warm water mush it into your hand creating a consistent paste.

  • Massage gently onto your face (or body) in a circular motion. (You can also use this as an amazing lip scrub)

  • Leave the mixture on your face for about 5 minutes.

  • Rinse off with warm water.

  • Steam your face with a warm facecloth.


TA-DAH! Skin that feels nourished & refreshed!

IMG_4207xxc

I recommend Mountain Rose Herbs for all of your herbal healing needs!

Do you make your own all natural scrubs or facials? What do you use for yours?

Thanks for the visit & Happy Healing!! <3

Images Edited using PicMonkey. Some of the links here are affiliate sites. & Please also see my disclaimer. Thanks Friends.

Tuesday, June 10, 2014

Growing Up Herbal Challenge.

Growing Up Herbal is having a fantastic monthly challenge for all the herbal / natural mamas out there! How sweet is that?!

Learning-Herbs-Challenge

Here you can find the introduction to this amazing challenge.

What's needed to join in on the challenge:
Make sure you’re signed up to receive Growing Up Herbal's weekly Letters To Natural Mama emails in order to stay up-to-date on info about the challenge.

Then, head out and purchase the following:

Once each weekly project is complete,Growing up Herbal asks that you take photos of your creation, upload to social media, tag on their Facebook Page / Twitter (@GrowingUpHerbal) & hashtag #GUHjuneherbchallenge

If it doesn't already sound like a super fun challenge, it gets better! Growing Up Herbal is offering one lucky participant a Herbal Face Kit from Mountain Rose Herbs valued at $29!

herbal-_facial_kit
It includes the following:

  • Herbal Steam - Open pores with skin nourishing plant oils.

  • Cleansing Grains - Gently exfoliate dead skin and clear pores.

  • Green Clay Mask - Absorb toxins, stimulate circulation, and deep clean pores.

  • Wild Rose Facial Oil - Moisturize, protect, and balance your skin.

  • Rosewater Toner - Invigorating astringent to tighten pores and seal in moisture.


I wanted to pick a little something nice for you mama… you do so much to care for your sweet little ones, and you deserve something that will help you refresh and rest from those long hard days of mothering!

In the week 1 challenge, you will learn how to make Calendula infused oil, which is useful for so many things. Included is a bonus recipe for making Calendula Healing Salve!

Well, what are you waiting for? Head on over to review the first challenge & get started!


HAPPY LEARNING! <3

Monday, June 09, 2014

Watermelon & Coconut Popsicles.

These look too delicious not to share! I am most definitely going to give these a try!

All Natural Acne Relief - Recipe for Remedy.

I have extremely sensitive skin, and it seemed like anything and everything I tried only caused some sort of reaction. I started researching ingredients in the store bought products and was disgusted with the amount of chemical garbage that is being distributed. To put something like that on our delicate skin just wasn't okay with me, so I set out to heal my face all naturally. Although I use it strictly on my face, this can be used on back / chest acne as well.

[caption id="attachment_100" align="aligncenter" width="640"]All natural Acne cream DIY All Natural Acne Healing Cream - Recipe[/caption]

I've included a link at the bottom of this post for our new Calendula Salve recipe. It works wonders on slow healing, stubborn acne and scars!

The oils I found to be most beneficial to healing acne are:

  • Coconut Oil

  • Lavender Oil

  • Tea Tree Oil


(Make sure the essential oils you are using are pure and undiluted. OR you can try making your own)

Coconut oil has antibacterial and anti-fungal properties so it gives it an extra boost on healing. Not only does it help cleanse and heal acne, it also helps to resurface any scarring caused by acne.

Lavender oil is also antibacterial and acts as a soothing agent for pain and redness. Lavender oil is said to be useful in preventing future breakouts, and clearing up old acne scars.

Tea tree oil also has beneficial antibacterial, anti-fungal and anti-inflammatory properties, making it perfect for healing acne. It also reduces redness and swelling.

Essential oils can be damaging to the skin if applied directly, to dilute, add ten drops of essential oil to 1oz of coconut oil. (You could also try aloe vera instead of coconut oil or even try out other carrier oils. Different oils have different properties to help different skin types. Check out my research list of carrier oils here)

This recipe is something I personally have used on my face for a while now. It has helped clear up my spots and is even resurfacing and dulling out my scars.

  • 20z Coconut Oil

  • 10 drops of Lavender Oil

  • 10 drops of Tea Tree Oil


Depending on how much you want to make at a time will depend on how much of each ingredient you need.

I use a melting pot but you can also use a double boiler.

  1. Put Coconut oil in a mason jar / jam jar.

  2. Place the jar in a pan filled a quarter of the way with water and turn on low. Don’t boil, and don’t heat the glass up too hot as the jar may burst. Coconut oil will melt very quickly. Be sure not to allow the water to get into the oil. 

  3. Remove from heat CAREFULLY! (the jar will likely be hot) USE OVEN MITTS

  4. Stir in your desired amounts of essential oils. I use a chop stick for this.

  5. Pour into the container(s) you will be keeping the mixture. Allow to cool. Place airtight lids onto containers & store.


Depending on how you like to apply the mixture, you can store in the fridge as coconut oil will liquify at 76 degrees F (24 C). It is a little harder to get out of the container, but will keep much longer if kept cool. You could always spoon out the amount you will be using and allow it to melt. Coconut oil melts almost immediately when applied to skin.

DIRECTIONS FOR USE: With this, a little goes a long way. After I wash my face (I use an all natural tea tree oil blend) I simply dip my (CLEAN!) finger or cotton ball into the container and spot where it's needed most and then blend it all together. It's also very hydrating if you have dry skin issues, like me. It will leave your face looking a little shiny for a short while so I like to put it on before bed or a few hours before I am going out anywhere. It takes about 10-15 minutes to work its way into your skin.

Alternatively - You can check out our new recipe: Calendula Healing Salve for stubborn or slow healing ache, and scars. Just one application of this to my face made all the difference! I'm working on an acne version of the Calendula salve now but the standard version works amazingly as well!


HAPPY HEALING! ~ Please remember to do your own research when trying all natural products. Everyone reacts differently to everything.

I recommend Mountain Rose Herbs for any of your herbal needs. You can purchase all ingredients needed for this recipe from them.


[embed]https://www.mountainroseherbs.com/assets/content/affiliate-program/banner-403x88-1.jpg[/embed]

Do you have an all natural acne regiment? Have you tried Lavender or Tea Tree on your face? What works best for you?

Images Edited using PicMonkey. Some of the links here are affiliate sites. & Please also see my disclaimer. Thanks Friends.


Thursday, June 05, 2014

Choosing the right Carrier Oil for your Handmade Remedies.

This is a list of CARRIER OILS - for a list of Essential Oils & Their properties see HERE

[caption id="attachment_503" align="aligncenter" width="640"]Choosing the right Carrier Oil Choosing the right Carrier Oil[/caption]


SKIN TYPE

Normal 


Dry / Damaged / Mature

Oily / Acne Prone

Sensitive / Prone to allergic reactions

Skin Issues


Eczema / Psoriasis


Scars / Stretch Marks

Burns / Bruises / Cuts / Scrapes / Stings


Hair


Dry / Damaged

Dandruff

Hair Loss 

I recommend Mountain Rose Herbs for all your herbal needs. They sell a wide variety of Carrier Oils.


1-300x100

An excerpt from Mountain Rose Herbs on the different qualities of carrier oils:


  • Cold Pressed - A method of mechanical extraction where heat is reduced and minimized throughout the batching of the raw material. This helps the oil maintain its original state, constituents, and depth. Temperatures are rigorously controlled to ensure that it does not exceed 80-90 degrees Fahrenheit. Although not a practical method of extraction for all vegetable oils on the market it is highly regarded as the extraction method of choice.

  • Expeller Pressed - A method of natural, mechanical extraction and processing of oils where a small amount of heat is produced simply through the frictional heat created by hydraulic presses. This is usually around 120-200 degrees Fahrenheit and makes the oil suitable and economical as a base for cosmetics because of its fairly undisturbed molecular state. It also makes a fine food grade oil.

  • Refined - A fully processed oil where it has been exposed to all methods of refinement including a flash fluctuation in temperature as high as 450 degrees and winterization as low as -30 degrees, deodorization, which removes the heavy and often unsettling odor in oil, and finally bleaching, where natural clays and other mediums are used to alter or remove an oils color, and scent. This makes for an economical oil in cosmetics and body care products, but it is not the healthiest as a food grade oil.

  • Partially Refined - A process where only some of the methods available are employed to produce a manufactured oil. Only one or two of the three available methods are used in a partially refined oil. These include, but are not limited to; deodorization, winterization and natural bleaching. These methods are used for oils which have been known historically to go rancid quickly, and they are also used to further stabilize an oil or remove its heavy odor and deep color.

  • Unrefined - A process of mechanical extraction and screen filtering where no additional refining process has taken place. This ensures the finest quality product and makes the oil the most exquisite for food and cosmetic preparation. The unrefined process helps oil retain a rich, strong flavor and color that is true to its natural state. Unrefined oils are always darker in color and richer in scent.


Most of the vegetable and carrier oils offered by Mountain Rose Herbs are Earth Kosher

Some of the links here are affiliate sites. & Please also see my disclaimer. Thanks Friends.

Resources: 

Mountain Rose Herbs

http://heaneyl.hubpages.com/hub/carrier-oil-properties-and-effects