Showing posts with label peppermint. Show all posts

Monday, October 20, 2014

DIY - Peppermint Tea Tree - Foot Soak

Give your tired aching tootsies a much deserved rest with this simple DIY foot soak. Epsom salts help to relieve pain by pulling toxins out of our body. Peppermint is great for releasing tension and relaxing nerves, it's also naturally cooling which helps relieve aches and pains.  Tea Tree has anti-fungal and antibacterial properties making it perfect to use for feet!  This mix of oils also works exceptionally well for combating odor.
“Take care of your body. It’s the only place you have to live.” – Jim Rohn

peppermint foot soak DIY all natural

What You'll Need:


Tools:

  • Mixing bowl & spoon

  • Airtight storage jars ( THESE, THESE, or THESE are similar to what I used)


To Make:


Depending on the amount you are making will depend on how much of what you will need. I suggest filling one of your jars and pouring it into the mixing bowl. Do this for however many jars you are making.

If you're adding baking soda you can mix it right in with the dry salts. 1-2 tbs per cup of salts should do the trick. (This helps to restore pH balance)

Next, add in your scent and colorant. (A little goes a long way with both) For a 250ml (half pint) mason jar I would start with 2 drops of blue, 1 drop of yellow colorant & 2-5 drops of peppermint oil and 1-3 drops of tea tree.

Mix everything until it's evenly combined. You can add in more scent or colour (or both) until you're happy.

peppermint tea tree foot soak 1foot soak diy natural

Once you've got the scent and colour you like, carefully spoon into your jar(s). You can do this with a funnel if it's easier.

Label your jars as you like, add a pretty ribbon etc.

peppermint foot soak diy

If you are using these as gifts, feel free to print out the label I've made up for my jars. You can also see our post on creating labels to make some of your own.

HHM PEPPERMINTTo Use - Scoop 1-2 scoops into at least a liter of warm water.- These little wooden scoops are adorable and would make a perfect addition to this for a gift.

Soak and enjoy!


Happy Tootsie Soaking! ~<3


DIY peppermint tea tree foot soak

I recommend Mountain Rose Herbs & Starwest Botanicals for all of your herbal healing needs! You can purchase any extra supplies over at Amazon.ca. Images Edited using PicMonkey. Some of the links here are affiliate sites. & Please also see my disclaimer. Thanks Friends.

Wednesday, September 24, 2014

Herbal Steam - Decongestant.

I had written a post when I started this blog, called Healing Steam – Cough, Cold, & Stuffed up Noses. This is for a similar steam with different ingredient options. I decided to make a new one with just herbs. Herbal steams can be so beneficial. This steam works wonderfully for chest congestion, coughs and stuffed up noses.

decongestant herbal steam


To Make:


2 tsp each of the following herbs:


  • A large heat safe bowl

  • Boiled water


To Use:


  • Place your herbs in a heat proof bowl and pour in enough steaming water to cover the herbs.

  • With a towel over your head to create a 'tent', hover over the bowl inhaling the steam. (be sure the steam isn't so hot that it may burn your face) I like to keep my eyes closed because the peppermint can make them water.


This brews into a beautiful dark tea. The strained water (once cooled to being warm but not hot) could probably be used for extra relief by soaking a cloth in the mixture and laying it across your chest.  I'm going to try it and I'll let you all know.

What are your favorite herbal steam blends?

HAPPY HEALING <3

*Medical advice should be sought for those who suffer from asthma or allergies prior to using a herbal steam.*

I recommend Mountain Rose Herbs for all of your herbal healing needs! You can purchase any extra supplies over at Amazon.ca.
Images Edited using
PicMonkey. Some of the links here are affiliate sites. & Please also see my disclaimer. Thanks Friends.

Sunday, July 06, 2014

All Natural Migraine Relief - Compress and Soak.

These all natural, compress and soak remedies are an extension of the original post Headache Relief Salve~ DIY All Natural Remedy. I've added some additional information on reliving migraine tension quickly. (Along with some all natural product options you can purchase and try)

[caption id="attachment_538" align="aligncenter" width="533"]Migraine Relief Compress and Soak Photo Credit: joannastar.deviantart.com[/caption]

Head Compress:

Add oils to a cup of water and mix well. dip the facecloths into the mixture and wring out. Lay one cloth across your forehead and one on the back of your neck. Then proceed to the hand or foot soak.

Hand or Foot Soak:

  • 5 drops of lavender oil

  • 5 drops of peppermint or ginger oil

  • sink or bowl full of hot water (test temperature, not too hot!)


For the foot soak I like to add in some Epsom Salts. This is really just an added bonus as they help to pull out toxins and impurities in your body. (Optional)

Soak hands in water for 2-5 minutes. You can also do this to your feet. I find the fastest way to relieve migraine pain is the bottom of your feet. (Rubbing the salve into the bottom of your feet works wonders)

Some Other All Natural Options:


Ginseng is also an active headache reliever.


Wood Betony - The leaves prepared as a tea which is useful for headaches and mild nervine. Mountain Rose Herbs also offers seeds to plant your own.


Increasing Garlic intake is also known to reduce frequent headaches.


Please also see the Headache Relief Salve post for additional headache relief. This is by far my favorite salve.

Happy Healing!

I recommend Mountain Rose Herbs for all of your herbal healing needs!
Images Edited using PicMonkey. Some of the links here are affiliate sites. & Please also see my disclaimer. Thanks Friends.


What do you use to relieve headache tension?

Headache Relief Salve~ DIY All Natural Remedy.

This headache relief salve is a light, aromatic mix of peppermint and lavender oils. I can  honestly say that this is the most used salve I make in my home. Everyone benefits from it. It works wonders for tension headaches, head colds, migraines and more.

Peppermint is known to relax muscles and spasms, making it ideal for releasing headache tension. Peppermint helps relieve pain and the added benefits of soothing Lavender magnifies the healing properties. Lavender acts as a mild anti-spasmodic, alleviating inflamed blood vessels causing the head pain.

The aroma is magnificent. I find this blend helpful as an aromatherapy "inhaler" also. It's light scent is relaxing, good for relieving stress, nervousness and even depression.

I've included an extension to this post. Please see migraine compress and soak for extra relief.

Headache Relief Cream

What You'll Need:


Recipe 1 (Solid Salve):


This one can be kept out of the fridge without melting. For a softer base, see Recipe 2.

Depending on your preferences, you can add a few more drops of each essential oil.

Recipe 2 (Softer Base & Simplest Recipe):


This one will liquify to an oil out of the fridge but solidify when kept cool. It will melt easily when introduced to your skin.

In my first batch I used peppermint oil I had made from Infusing my own oil. If you're going to infuse your own oil, you can use it as your base oil and leave out the coconut oil. See recipe below if you want to use your own infused oil.

Recipe 3 - if you're infusing your own oil:


*These are basic measurements. Depending on the size of container you are using to store your finished product will depend how much you need. (In tbs amounts, use 1 tbs of beeswax to 6 tbs of carrier oil)

Preparation Items You Will Need:


  • Melting Pot / Double Boiler or a pan on the stove (low heat)

  • Mixing Stick (I use a chopstick)

  • Storage Jar(s)


Preparation for Recipe 1:


  • Melt your Beeswax or Carnauba Wax first.

  • Stir in coconut oil and allow for that to melt. (low heat)

  • Reduce Heat & add in your Essential Oils. Stir well until everything is combined.

  • Remove from heat and pour into your storage container immediately. (It doesn't take long for this to harden)


Preparation for Recipe 2:


  • Melt coconut oil in your pot  (low heat)

  • Reduce Heat (or remove from heat) & add in your Essential Oils. Stir well until everything is evenly combined.

  • Remove from heat and pour into your storage container immediately. (It doesn't take long for this to harden)


Preparation for Recipe 3:


  • Melt your Beeswax or Carnauba Wax first.

  • Next, add in Infused Oil and stir ingredients together until everything is combined uniformly.

  • Reduce Heat & add in your Essential Oils.

  • Remove from heat and pour into your storage container immediately. (It doesn't take long for this to harden)


Depending on the firmness you prefer, you can add more beeswax or add more carrier oil to make a softer base. I like mine to be soft, plus I keep it in the fridge so it stays hard, but melts easily on the skin.

If you aren't happy with your finished salve, you can always melt it back down and add in more of what you need.

It's best to keep your mixture in the fridge. (At it's best if used within 3 - 6 months)

Apply to temples, base of neck, (right under hairline) the pain site (across forehead) and bottom of the feet.


*You can also use these oils in a migraine compress & hand soak.


Please Also See our post on Earache & Headache Relief for Children. <3

Happy Healing! <3

I recommend Mountain Rose Herbs for all of your herbal healing needs!
Images Edited using PicMonkey. Some of the links here are affiliate sites. & Please also see my disclaimer. Thanks Friends.

Tuesday, June 24, 2014

Make your own ~ 'WAKE UP' Herbal Shower Steam.

Whether you're in need of a pick me up, a wake up boost, or you're feeling groggy - this quick and simple Herbal Steam recipe will come to the rescue. It works wonders for me and I'd love to hear {if you try it} how it works for you! <3

How to make your own Wake Up Herbal Shower Steam!

I see posts about hanging Eucalyptus in the shower to relieve congestion and to clear the air from the steam. Eucalyptus is also known for it's analgesic properties, making it beneficial to pain relief. It's steam is also useful for relieving bug bites and acne.

Orange Oil is good for relieving the blues, 'groggies' or depression. It also acts as a soothing agent to dry or acne prone skin.

Peppermint Oil is widely used for keeping energy high, as well as improving concentration and alertness. (For an extra jump start, put a drop of Peppermint Oil on your tongue & rub some into temples and back of the neck.)

What You'll Need:


I say 5 drops of each but you can experiment to get a stronger (or more diluted) scent.

Put a spoonful of salt into your container to hold the oils. Crush up your eucalyptus leaves if you're using them. Mix together well.

Place in the shower where you can enjoy the scent of the steam. Either at the back of the tub where the water won't hit it too much, on the side of the tub or in a shower rack if you have one.

Once you're done, you can cap it off and save it in the fridge for your next shower. (It's safe to change the mixture after a week because of the herbs.)

Have you got any herbal steams you use in the shower?


I recommend Mountain Rose Herbs for all of your herbal healing needs!
Images Edited using PicMonkey. Some of the links here are affiliate sites. & Please also see my disclaimer. Thanks Friends.

Friday, June 13, 2014

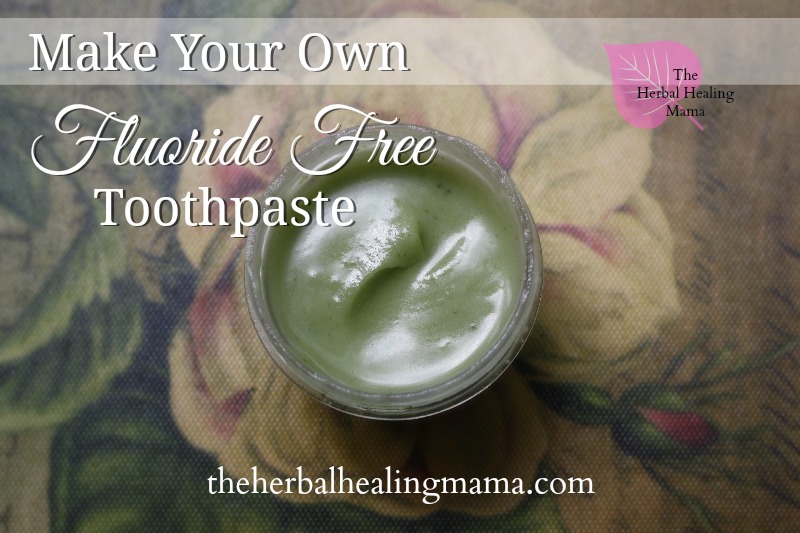
Make your own Fluoride Free Toothpaste!

With the dangers associated with fluoride, I would much rather cut it out of everything all together. I have been using this mixture for a while & thought I would share it here with you!


What You'll Need: photo 1


  • 2 tsp Baking Soda

  • 2 tsp Coconut Oil

  • 10 drops of Peppermint Oil

  • Stevia Leaves or Stevia Powder - I used 5 fresh leaves from my own Stevia plant. (It could use more, as it's still quite bitter. Usually you use 3x the amount of fresh leaves as you would dried.)

  • {Optional} If you have sensitive teeth, You can add in a few drops of Clove oil in, or I actually scoop a little bit of our Clove tooth Pain oil into my mix

  • Mortar & Pestle or Coffee Grinder

  • Storage Container


Directions:


  • Grind up Stevia into a fine liquid (if fresh - which I do prefer) Or fine powder if dry

  • Add in Baking Soda (I added everything right into the mortar & Pestle as it was easier to keep all of the stevia that way. photo 3

  • Soften Coconut Oil & Stir that in with a fork.

  • Finally Add in 10 drops of Peppermint Oil (If you like Minty Toothpaste) You could swap the Peppermint for Cinnamon, Lemon, or whatever your heart desires. If you have sensitive teeth, adding a few drops of Clove oil would be beneficial. (Just be certain that it is 100% pure, you don't want to be adding perfume oils into your toothpaste.)

  • Stir everything together well & scoop into your container of choice. I chose one I can dip my toothbrush into but you could also try this in a squeeze bottle.


**Because of the fresh stevia leaves, it's a safe bet to discard the mixture after a month. Keeping it in a cool dark place will keep the mixture fresh longer but don't make more than what you'll use in approximately 30 days. If any discoloration begins to form, discard immediately & start with a fresh batch. You can also check out my post about preservatives for general guidelines to all natural products' shelf life.

I've also updated my teeth care regiment by adding a post on oil brushing.

HAPPY BRUSHING! ~ Have you got any all natural toothpaste recipes? I'd love for you to share them here!

Image Edited using PicMonkey. Some of the links here are affiliate sites. & Please also see my disclaimer. Thanks Friends.
Sunday, May 18, 2014

Healing Steam - Cough, Cold, & Stuffed up Noses.


All natural relief from colds, flu, sinus infection, & congested nose. A super quick & easy steam to help alleviate symptoms.


What you'll need (& I will post both ways to create this) :


Method #1


  • A large bowl

  • Boiled water

  • Peppermint / Peppermint oil

  • Camphor oil

  • Eucalyptus / Eucalyptus oil


OR if you don't have these ingredients laying about the house then an easy alternative is:

Method #2

  • A large bowl

  • boiled water

  • Peppermint tea bag (I've use Tetley Pure Peppermint)  

  • Vicks® VapoRub®


*Please* be sure, your bowl is safe for boiled water, if it's not then only heat the water until it's steaming.


Method #1 

Put about 5 drops of each oil in the bottom of the bowl, pour in the steaming water, mix, then with a towel over your head to create a 'tent', hover over the bowl inhaling the steam. (be sure the steam isn't so hot that it may burn your face) I like to keep my eyes closed because the camphor and peppermint can make them water.


Method #2

Rub some Vicks® VapoRub® around the bottom of the bowl, toss in a peppermint tea bag and add the steaming water. Then with a towel over your head to create a 'tent', hover over the bowl inhaling the steam. (be sure the steam isn't so hot that it may burn your face) I like to keep my eyes closed because the camphor and peppermint can make them water.


HAPPY HEALING. 


Remember, my advice is not intended to replace that of your medical practitioner, always seek professional medical advice if you are very ill.


Do you do any herbal steams? I'd love for you to share with me in the comments below. I'll add some more herbal steams soon!