Showing posts with label Make Your Own. Show all posts

Sunday, October 26, 2014

DIY Whipped Coconut Oil Body Butter.

Coconut Oil is so amazing for our skin, one problem is, it's a little difficult to scrape out of the jar. Well, here is a simple solution so you can enjoy the nourishing benefits of coconut oil - anytime.

This recipe can be customized to fit any preference. Essential oils can be added for different scent options, & other nourishing oils and butters can be added as well. Some amazing options would be Vitamin E OilShea Butter or Cocoa Butter.

This is a pretty basic recipe with only 3 ingredients!

How to make your own Whipped Coconut Oil Body Butter


What You'll Need:


 I added 1/2 cup of coconut oil, 1 tbs of calendula infused oil and 4 drops of coconut scent. 

Tools You'll Need:


  • Mixing Bowl

  • Hand Mixer (Or better yet, a stand mixer) 

  • Spoon

  • Airtight container of choice


To Make: 


How to make your own coconut oil body butter


1. Scoop your coconut oil into your mixing bowl and add in any extra ingredients. (I added calendula infused oil & essential oils) 

--- I did this straight from the jar. While the coconut oil was solid, I think it would have turned out fluffier if I had of refrigerated it first. Some people like to melt everything together first, refrigerate it overnight and then mix it in the morning. (I'll definitely try this next time) 

2. Turn your mixer on high and beat for about 5 minutes, or until everything is as fluffy as you'd like it. 

--- You may have to scoop it all to one side to get it all evenly if you aren't making a big batch. 

3. Once you're happy with the consistency, carefully scoop it into your jar(s). 

VOILA! ~ Simple yet amazing body butter!

<3

If the done butter gets too warm it will melt back into an oil state BUT if it's kept too cold, it may become a little hard. It's best to keep it somewhere cool and not in direct sunlight. 


This was my very first attempt at a body butter. I don't think it turned out too bad. It definitely could have been worse. ^_^ I just wish it were a little fluffier, so that's something I will work on next time around.

Here are some pinnable images - I would love for you to share! <3

DIY Whipped Coconut Oil Body Butter 3a

Whipped Coconut Oil Body Butter - How To


DIY Whipped Coconut Oil Body Butter


Happy Creating! ~ <3


Have you made your own all natural body butter before? 

What are your favorite body butter ingredients or scent options? 

I recommend Mountain Rose Herbs & Starwest Botanicals for all of your herbal healing needs! You can purchase any extra supplies over at Amazon.ca. Images Edited using PicMonkey. Some of the links here are affiliate sites. & Please also see my disclaimer. Thanks Friends.


 Now Available On My Etsy! 

Whipped Body Butter Whipped Body Butter Etsy


Saturday, October 25, 2014

10 Fantastic Fall / Halloween Craft Ideas!

I have seen SO many Amazing & Creative DIY Fall Craft Ideas circulating the web & I wanted to do a bit of a collection here to share them with you.  


DIY Fall and Halloween Crafts

Witch's Apothecary Potion Bottles


By - Magia Mia


[UNSET]


DIY Leaf Mason Jars.


By- PLAN PROVISION


9189e28909b4cbb9404a058e98e99114


DIY Halloween Severed Head


By - Crafts Unleashed


DIY-halloween-head-crafts-unleashed-1024x682


CINNAMON PUMPKIN CANDLES


By - Hello Natural 


IMG_6207


Enchanting Halloween Lanterns


By - Adventure in a Box


Enchanting-Halloween-Lanterns-Header


DIY Floating Ghost


By - DIY Louisville


diy-floating-ghost-5_thumb[2]


DIY Halloween Books


By - Better After 


altered_books_for_halloween


Pet Ghost in a Jar


By- Penny Wise


P1060205


Haunted Tree


By- Behind The Studio


226efbc62dc76ba93ab90927f35f0f7ee98f80ac_600


Sparkle Web Decor 


By- Redbook 


glittery-webs


And here's a couple of our own - in case you missed them.


DIY Jack-O-Lantern Jars


DIY Jack-O-Lantern Jars

DIY – Book Of Shadows -


DIY BOS


Happy Crafting! ~ <3


10 Fantastic & All Natural Fall Inspired Beauty Recipes.


10 Fantastic Fall Recipes.

DIY - Book Of Shadows -

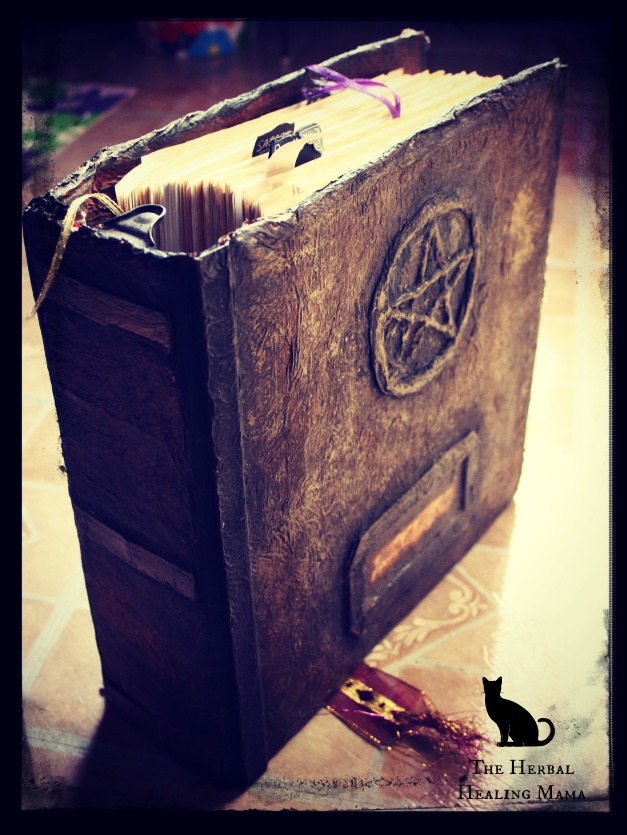
My son and I created this antique looking Book Of Shadows quite a few years ago and I thought since it's spooky season, why not share the easy DIY here with you! <3

DIY BOS

What You'll Need:


  • Old Book or Binder ( We made this one out of a binder)

  • Paper Towel, Cheesecloth, Toilet Paper, etc.

  • White Glue or Modge Podge

  • Foam brush or paint brush

  • Glue Gun / Cardboard / Print Outs or Halloween things to stick to the book.

  • Acrylic Paints ( We used black as a base and dry brushed golds and browns into the top)

  • Matte Clear Coat Spray (Or a final layer of Modge Podge)

  • Tea or coffee (if you are staining pages to look old)

  • Newspaper or something to cover your workspace.


To Make: 


Choose your book and start with thin strips of paper towel (or whatever you chose to use) I like the paper towel the best because it's strong enough not to tear but wrinkles up easily to look like old worn leather.

Paint a small patch of glue on your book and lay the paper towel over it, then paint glue again over the paper towel. Continue this until your book is entirely covered. - You may have to do one side at a time and allow to dry in between or you may end up with a sticky mess. (You could try opening the binder and laying it flat but we also wrapped the paper towel cover into the inside of the book right up until the binder rings. Also- If you let it harden this way, you'll have a hard time closing it later. It's probably best to do one side at a time.)

You can add extra wrinkles, cardboard shapes, paper towel shapes, glue gun shapes, you could even stick little rubber halloween decorations to the book and then do a light coat of the paper towel and glue mixture over top. - The pentagram on ours was made from rolled up paper towel but I think a glue gun may make a more precise shape. The title cut out at the bottom is cardboard and a printout. The side of the binder we put cardboard rectangles along it to give it more definition.  Originally we had some really neat rustic looking ornate corners on the front, which were from the scrapbooking section at the dollar store but they fell off somewhere along the way.

Once the entire book has dried, you can paint it however you like. We did a base coat of black and then using a dry brush, dipped into golds and browns, wiped extra paint off onto a paper towel and then the lightly over the top bumps and embellishments on the book.

Once you're happy with the paint and it's finished drying, you can clear coat it with a matte spray or an extra coat of glue or modge podge.

If you are adding your own pages and want them to look old and spooky you can stain them with tea bags or coffee. Make a STRONG mixture in a heatproof bowl & dab the pages with tea bags. Lay them out to dry.

Finally, You can add feathers, twine, ribbons, page tags, or any such things your creative mind can think of.

We added some pockets on the inside as well for extra bits of paper etc. To do this, lay a few sheets of paper towel onto a cellophane wrapped cookie tray (so it doesn't stick) and paint with glue like you did the book. leave the sides flatter than the middle so it's easier to glue on later. Once it's dry, paint it the same as you did the book and glue along the bottom and sides leaving the top unglued. (I'll try to add a few photos of the making of)


Everyone who has seen the book sitting on our shelf says: "Oh, wow! that book must be really old!"

I love how it turned out and it's extra special because it was a project my son and I made together. We have had this book around for about 6 years and it's still as great looking as day 1, everything has held us really well.

DIY Book Of Shadows


BOS DIY

DIY Witches Book BOS


HAPPY CRAFTING!! ~ <3


You can purchase any extra supplies over at Amazon.ca. (Affiliate link) 

DIY All Natural Body Mist.

An all natural alternative to store-bought perfumes. This was one of the reasons I began my natural journey. Both my son and I have severe reactions to anything from (store-bought) deodorant, to laundry detergent. I've never been able to wear commercial perfumes and now that I know what kind of chemicals are in some of them, I'm happier making an all natural body mist at home. I have some permanent scars I am trying to mend from the hives I would break out with. It aged my chest horribly where I would spray it. It caused a lot of long-term and possibly permanent damage. Luckily I have learned about things like Calendula and it's been helping me heal.

Another alternative I have posted is DIY all natural Solid Perfume.

DIY All Natural Body Mist. - An all natural alternative to store-bought perfumes.


What You'll Need:


  • Distilled Water

  • 10-20 drops of your favorite essential oil blend (depending on container size.) I used 10 drops Coconut, 5 drops Nag Champa, and 5 drops Vanilla. It smells amazing! - You can find a huge list of amazing essential oils at Mountain Rose Herbs or Starwest Botanicals

  • Spray Bottle


To Make: 

Fill your spray bottle with distilled water & add in your desired amount of essential oils. SHAKE SHAKE SHAKE!

We all know oil and water don't mix, BUT I've never had any issues with this blend and have been using it for quite some time. Just be sure to shake it everytime you're going to use it. 


Enjoy! ~ <3

I recommend Mountain Rose Herbs & Starwest Botanicals for all of your herbal healing needs! You can purchase any extra supplies over at Amazon.ca. Images Edited using PicMonkey. Some of the links here are affiliate sites. & Please also see my disclaimer. Thanks Friends.

Solid Perfume - DIY - ALL NATURAL

I personally only use my natural solid perfume or natural body mist. Not only can I not wear regular perfume, I don't want the chemicals on my skin. This is a wonderful all natural alternative to those of you that also have sensitivities or feel the same way.

This simple recipe is completely customizable depending on your scent preferences and could be used to make beautiful gifts for friends & family.


What You'll Need: 


  • Melting pot or pan

  • stir stick or spoon

  • measuring cup or something to pour your mixture into container.

  • Lockets, Tins, Lip Balm Sticks or Containers of choice.


To Make: DIY solid perfume


Melt Beeswax first. (double boiler, melting pot, pan on stove - medium heat)

Add in coconut oil or shea butter (or both if you'd like) Stir until everything is combined.

Turn to low heat or remove from heat.

Finally add in essential oils.

Stir some more.

Remove from heat and pour into your lockets or containers. Sometimes pouring it into a measuring cup first is easiest to precisely pour into the small lockets. Try to do this somewhat quickly as the mixture will solidify quite quickly. (Though, don't worry if it does, you can always scrape it back into your pan and re-melt the mixture.)


To Use:

Rub on wrists, neck, chest and massage into skin. (alongside smelling wonderful, it's also very nourishing to the skin)

HAPPY CRAFTING!! ~ <3 


I recommend Mountain Rose Herbs & Starwest Botanicals for all of your herbal healing needs! You can purchase any extra supplies over at Amazon.ca. Images Edited using PicMonkey. Some of the links here are affiliate sites. & Please also see my disclaimer. Thanks Friends.

Friday, October 24, 2014

Tattoo Balm - DIY All Natural Healing.

Natural Tattoo Healing Balm is extremely effective during the healing process of your new tattoo. This will help speed the healing and protect your new tattoo from any infections etc. (If you take proper care)


This balm is loaded with anti inflammatory, antibacterial and analgesic properties making it perfect for new tattoos. Calendula also has natural restorative properties which helps to build strong skin cells and heal wounds. You can even use this on your healed tattoos to keep your skin nourished and the ink bright.

As you may or may not know, I have a few tattoos... ( ;) )


[caption id="attachment_1262" align="aligncenter" width="640"]Photos: Jay Terry + PPOC, Cyprian E & My Lovely Geofferson Dean Photos: Jay Terry + PPOC, Cyprian E & My Lovely Geofferson Dean - 2011[/caption]

I have always only used vitamin e oil to speed the healing process. Once I found out about the healing powers of calendula and started using that as well, I noticed my tattoos were healing much brighter.


Tattoo Healing Balm

The following recipe is for a 50ml jar. You can calculate the amount from this base recipe if you are making a bigger batch. Basic calculations would be 1 part beeswax to one part other ingredients. (depending how soft or firm you want the balm, you can take out or add more beeswax)


 What You'll Need:


  1. Melt beeswax first. You can do this using a melting pot, double boiler or pan on the stove. (medium heat)

  2. remove from heat.

  3. While the mixture is still hot, add in coconut oil and shea butter.

  4. Next pour in vitamin e oil & calendula infused oils. Stir everything until it is combined evenly.

  5. Pour into your container & allow to cool before using.


It is recommended to keep the tattoo clean with unscented, natural soap. Keep it moist and don't let it dry out. Apply this balm regularly to clean tattoos.

All Natural Tattoo Balm DIY

Happy Healing!

I recommend Mountain Rose Herbs & Starwest Botanicals for all of your herbal healing needs! You can purchase any extra supplies over at Amazon.ca. Images Edited using PicMonkey. Some of the links here are affiliate sites. & Please also see my disclaimer. Thanks Friends.

Sunday, October 19, 2014

DIY Lip Scrub ~ All Natural

This simple lip scrub recipe is nourishing to your lips & can add a nice lip tint as well if you choose to add in a natural colorant. Lots of store bought products contain harmful chemicals & why would we want to put that on our skin and so close to our mouths? :/

DIY all natural Lip Scrub 1

What You'll Need:


Tools:

  • Melting pot, pan on the stove or double boiler

  • mixing bowl & spoon

  • Airtight container(s) for your finished product.


To Make:


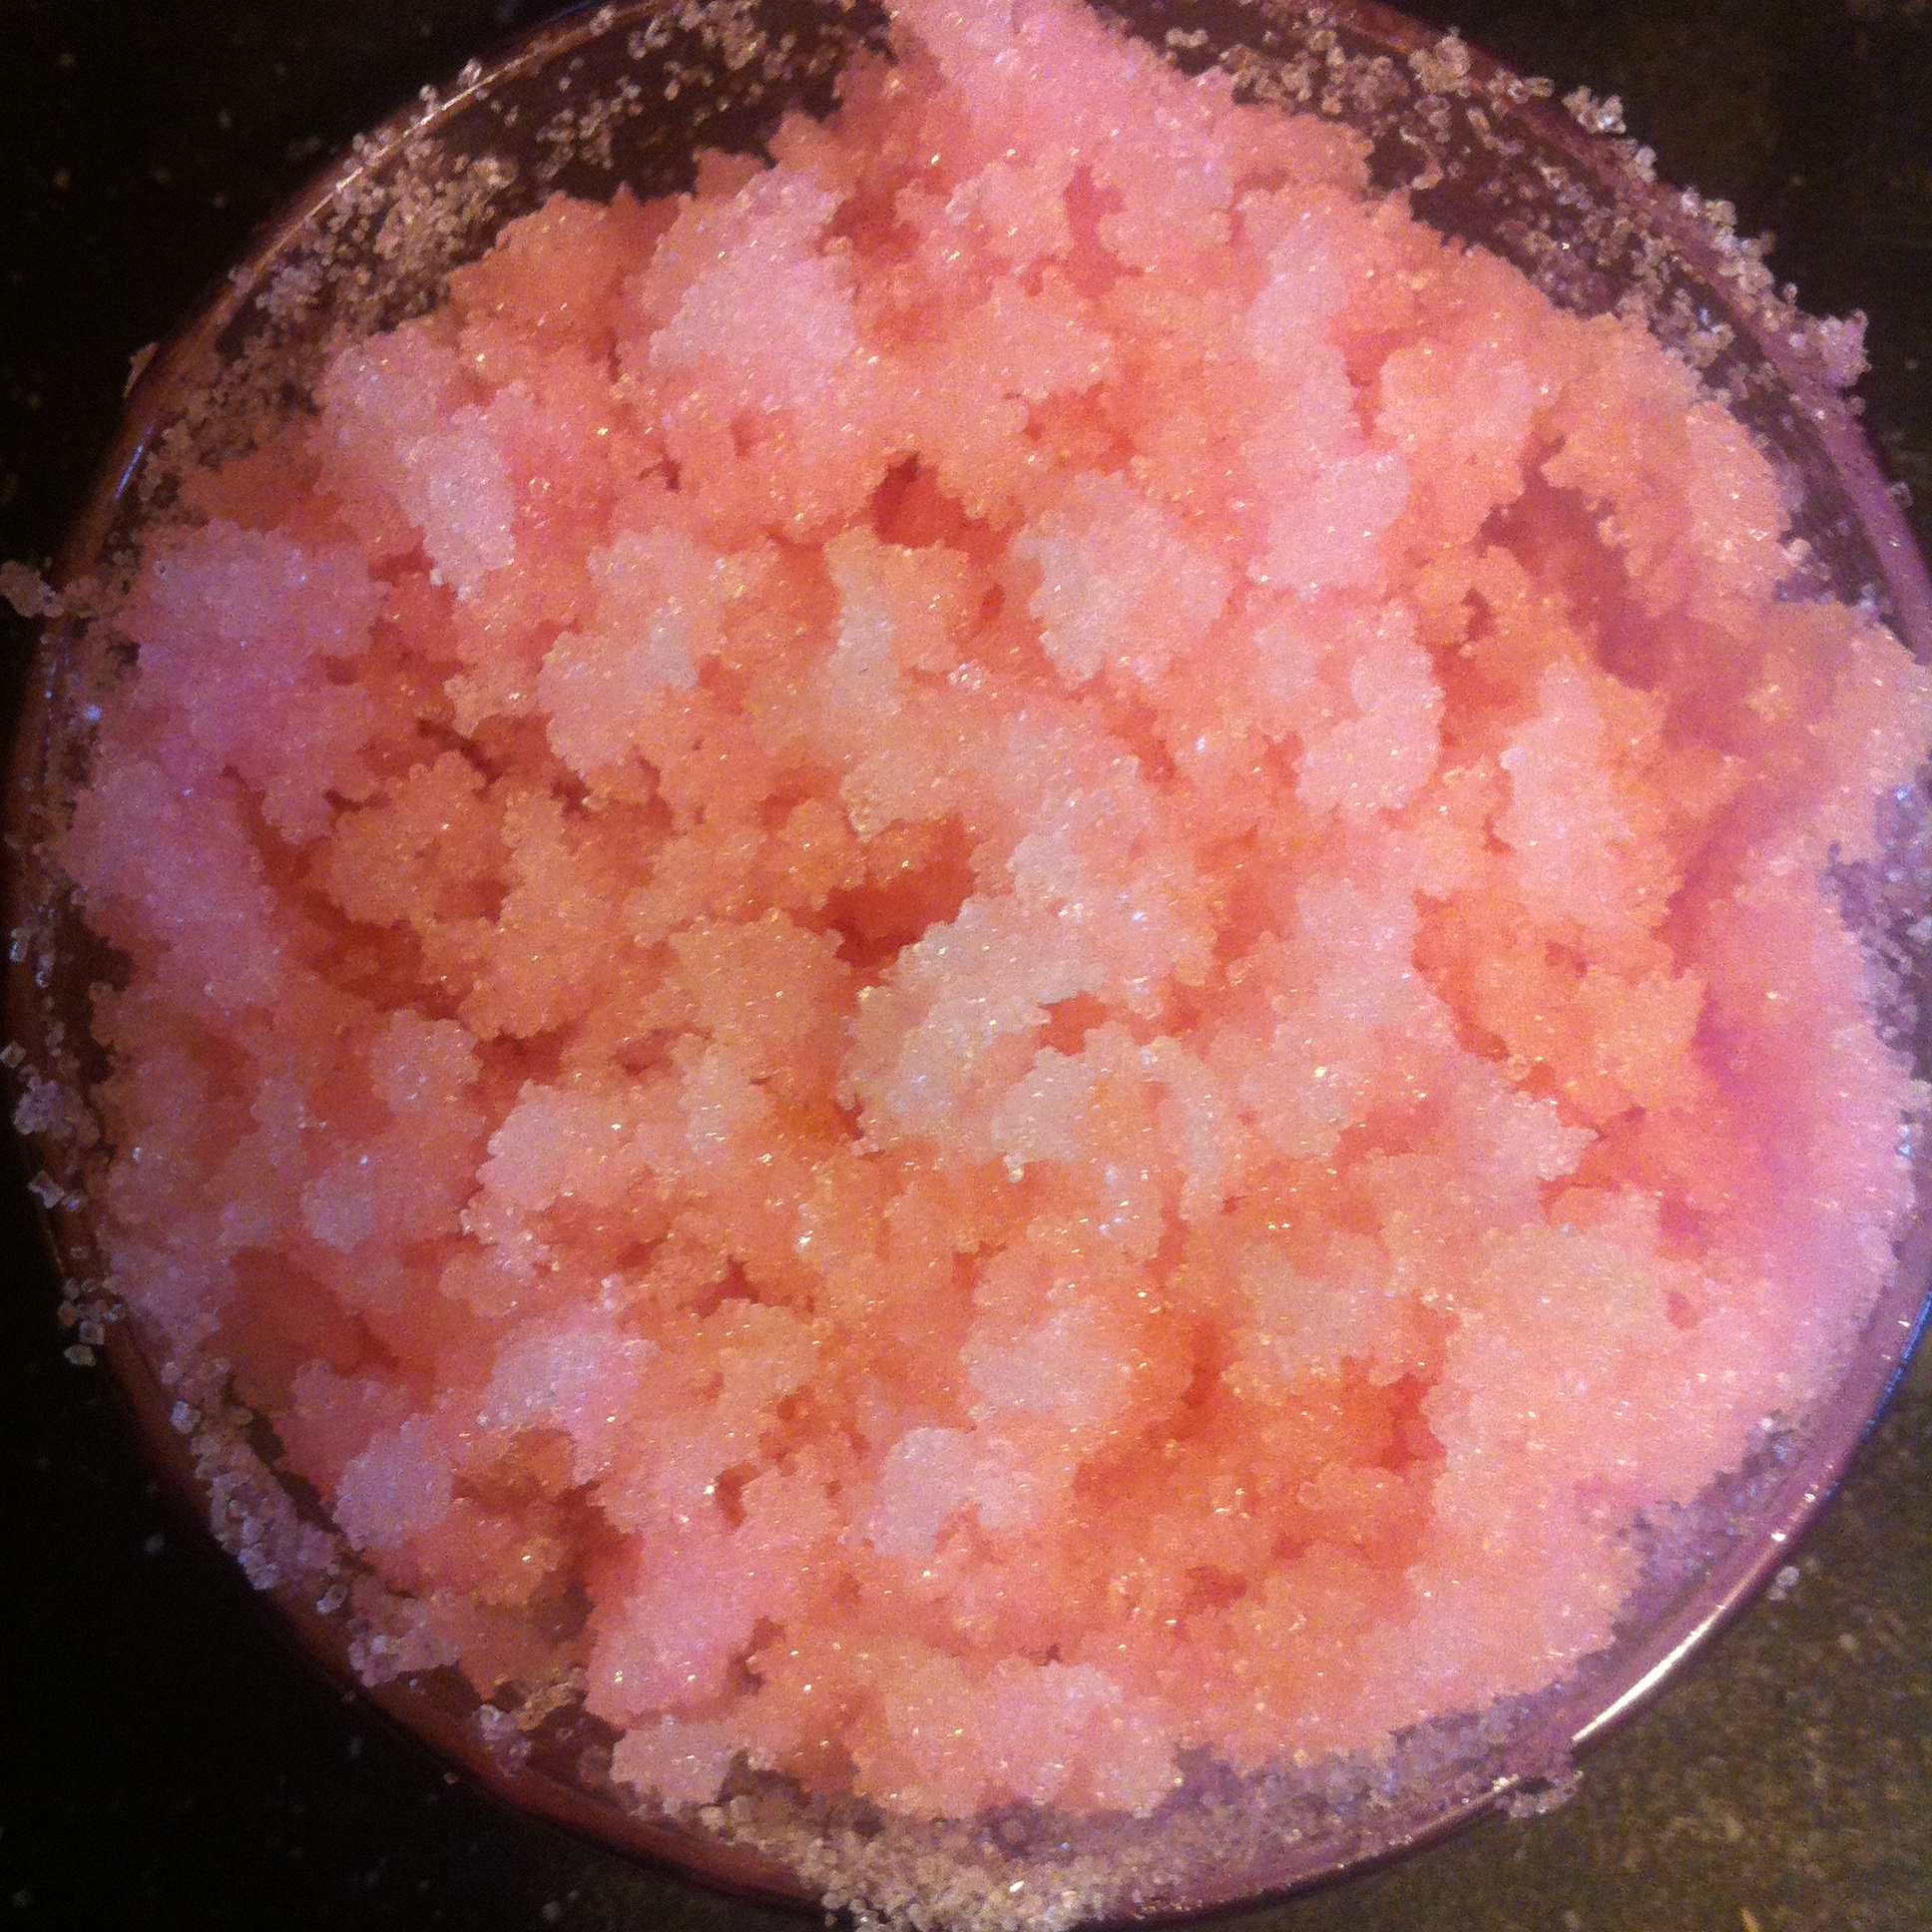
For a 2 oz container I used:

  • 4 tbs sugar

  • 2 tbs of coconut oil (or half and half with one of the butters)

  • 1 tsp honey

  • 3 drops of peppermint oil

  • 3 drops of red colorant


Start by melting your coconut oil & butters. You can do this with a double boiler, meting pot, a pan, etc.

Remove from heat and add in your honey, colour & scent. (if using)

IMG_2665

With your sugar in a mixing bowl, slowly and evenly pour the melted mixture over your sugar, stirring until everything is consistently mixed. 

IMG_2666

Sometimes it's easiest to add more sugar afterwards until you're happy with the consistency.

IMG_2671

IMG_2672

Spoon into your containers, add a label if you so choose & enjoy!

IMG_2674

IMG_2691

Here is a FREE printable if you're using similar containers and would like to use a similar label:

HHM SUGAR HONEYSee the post on creating labels to put the labels into a collage for easier printing.

Happy Exfoliating! ~ <3

I recommend Mountain Rose Herbs & Starwest Botanicals for all of your herbal healing needs! You can purchase any extra supplies over at Amazon.caImages Edited using PicMonkey. Some of the links here are affiliate sites. & Please also see my disclaimer. Thanks Friends.

Saturday, October 18, 2014

Sugar Scrub Cubes! ~ DIY all natural!

This recipe can be as plain or fancy as you'd like. All depending on your preferences. You can add in bits of herbs, natural colourants, different butters and oils etc. This post will be a down to the basics, as simple as possible post & later I will add more extravagant variations of the same basic recipe.

I find these incredibly more handy then a regular sugar scrub, as you would normally have to carry a scoop with you to the shower all the while being careful not to get water into the rest of the mixture. With these, you just bring a single cube along with you. No need for messes or containers!

I see a lot of these with a melt and pour soap base added. I don't have things like this on hand and so, if you're like me - you may want a recipe without all the fancy stuff! - Just your basic exfoliating sugar scrub - in cute little cubes!

make your own sugar scrub cubes

What You'll Need:


BASICS:

OPTIONAL:

Tools:


  • silicone mold ( I used one similar to THESE)

  • mixing container & spoon / spatula.


To Make:


For the 15 cavity mold I used to create these I used approximately

  • 2 1/2 cups of sugar

  • 1/4 cup melted coconut oil ( you can mix the butters into this measurement if you're going to use them )


Melt your butters and oils first. In a big mixing bowl, pour in your amount of sugar. Slowly pour your melted oil in, mixing constantly.  You want this to be spread evenly. You may not need all of the measured coconut oil.

I spritzed mine with distilled water. I find this helps hold everything together. (You will want to be sure these are fully dried before sealing these up though, as the water kept damp would create a bacteria issue)

Mix ingredients until you have a similar looking consistency as what is shown below. When your spoon is able to make a good firm indent without your mixture falling back, then you've got the right consistency.

sugar scrub cubes Spoon your mixture into your molds and push down firmly with a spoon or your fingers. You don't want any air pockets in between these or else they won't stick together properly.

sugar scrub cubes DIY

Leave your mixture in the molds until they have completely hardened. Trying to pop them out early will break them. This is where patience comes into play! ;) I left mine sitting for 3 days. You could also keep these in the fridge to solidify. As long as they aren't in a humid space.

Once you can press firmly on the tops of them and they seem to be completely solid, carefully pull the tray apart from side to side to start releasing them. Push from the bottom of the mold until they pop up and out.

sugar scrub cubes

You could let them air dry another day or so.

Adorable Right!? Now you can package them up any way you choose or store them in an airtight jar. We decided to wrap these ones in cellophane with a cute little ribbon. (Thanks Richelle for the brilliant idea)

Sugar scrub cubes packaged

To Use:

Bring a single cube with you into the bath or shower. With wet hands kneed the cube until it begins to crumble. Massage gently in circular motions where you need a little exfoliation. Always moving toward the heart. This helps regulate blood flow.

Happy Exfoliating! ~<3

Have you got a favourite sugar scrub recipe you make at home?


I recommend Mountain Rose Herbs & Starwest Botanicals for all of your herbal healing needs! You can purchase any extra supplies over at Amazon.ca. Images Edited using PicMonkey. Some of the links here are affiliate sites. & Please also see my disclaimer. Thanks Friends.

Friday, October 17, 2014

Coconut Pumpkin Spice Creamer! (for Coffee & Tea!)

I put up a post earlier about my yummy Pumpkin Spice Sugar discovery, and then I got to thinking... What about a Pumpkin Spice Creamer!?! This way, you wont have any of the possible leftover spice bits at the bottom of your cup like you do when you put the spice directly into the sugar.

You don't have to use coconut milk or cream for this, it's just what I prefer. You can make this with your favourite milk or cream.

Pumpkin Spice Creamer

WHAT YOU'LL NEED:


  • 1 cup Coconut Milk or Cream (Or any milk or creamer you prefer) (Amounts depend on container size you will be storing this in)

  • 4 tsp Pumpkin Spice (or however pumpkin-y you'd like this to be, really.)


Tools:

  • a pan on the stove

  • a strainer or cheesecloth

  • an airtight jar or container


TO MAKE:


  • Add your milk or cream to a pan and put it on the stove on low-medium heat (Don't boil!)

  • Once heated thoroughly, add in your tsps of pumpkin spice. (Be prepared for your kitchen to smell like you're baking a pumpkin pie!)

  • Stir, stir, stir. Allow everything to infuse together. I kept mine on the heat stirring nearly constantly for about 20 minutes.


photo 1

  • Remove from heat once everything is combined and allow to cool. (20-30 mins - this way the mixture has a little longer to fully infuse)

  • Using a fine mesh strainer or cheesecloth, strain out any excess spices that may have sunk to the bottom of the pan. Reserving the mixture into your airtight container. (I put a strainer over a funnel, into my jar)

  • Keep it in the fridge and go by the expiry date that was on the carton of milk or cream that you used.


ENJOY! <3

This makes for a great little treat if you're having a fall inspired get together or dinner party. (Or just for your morning coffee or tea)

What are your favorite fall or pumpkin flavored treats?

I recommend Mountain Rose Herbs for all of your herbal healing needs! You can purchase any extra supplies over at Amazon.ca.
Images Edited using PicMonkey. Some of the links here are affiliate sites. & Please also see my disclaimer. Thanks Friends.

Thursday, October 16, 2014

Pumpkin Spice Bath Blend, Lotion Bars & Sugar Scrub! ~ DIY

Pumpkin season is here! (Be Sure TO Enter October's GIVEAWAY HERE!)


Pumpkin is very beneficial for our skin, it's natural nourishing. These blends are more about the wonderful cozy Fall Scents with the healing benefits packed into the other ingredients. If you would like to have full benefits, you can use real pureed pumpkin BUT remember - only enough should be made for a one time use as it won't keep as long as dried ingredients.


These little blends are quick and super easy and would make really cute gifts!

Pumpkin Spice Blends DIY


PUMPKIN SPICE BATH BLEND:


WHAT YOU'LL NEED:

Tools:

  • Airtight jar(s)

  • mixing spoon

  • mixing bowl

  • funnel


TO MAKE:


The measurements will be determined by the size of container you are using. If you are making multiple jars for gifts you can measure the amount of salts per container and pour it all into one big mixing bowl.

Add in 1 tbs of pumpkin spice at a time, measuring by scent desired. If you're colouring the salts you can see some ideas at the bottom of the page.

Stir until everything is uniform and add with a funnel or spoon into your airtight jars.

Decorate your jars if you please or add a pretty label!

TO USE:

Sprinkle some into a tub of running water. Mix in until all of the salt crystals melt. Enjoy!


 PUMPKIN SPICE LOTION BARS:


WHAT YOU'LL NEED:

Depending on how firm or soft you like your lotion bars will determine how much of each ingredient to use. More beeswax will be more firm, less (or more of an oil) will be softer. SO I'd say for me, I like equal parts of each of the above ingredients BUT If you are adding in the optionals below (more beneficial for your skin) then I would put in a little bit more beeswax. (amounts will also depend on how many you are making)

optional:

Tools:

  • Melting pot or double boiler

  • stir stick or spoon

  • silicone molds of your choosing ( I used ones similar to THESE)

  • plastic wrap or cellophane

  • pumpkin stickers (optional) (Links below)


Pumpkin Spice Lotion Bars Pumpkin Spice Lotion Bars - The Herbal Healing Mama

TO MAKE:


Melt beeswax first (double boiler, pan, melting pot etc - I use a wax melting pot, but anything safe should do)

Slowly stir in your other ingredients, leaving shea butter until last. (it may 'crystallize' if heated too much) If at any point you'd like to test your consistency, you can do so by dipping a frozen spoon in your mixture.

Remove from heat and pour into your molds.

Allow to cool thoroughly or put them into the fridge to speed the process.

Now you can package them up how you'd like. I wrapped them in cellophane and stuck the labels and stickers to them.

These cute little pumpkin faces came from our local Dollarama but you can get them HERE if you don't have one local to you. They are actually for putting on your beverages. OR you could get really creative and make some up on PicMonkey and print them out!

TO USE:

You can either rub the bar directly on skin and massage in or you can rub the bar between your hands and rub onto skin. The bar will start to 'melt' and release it's nourishing benefits once warmed by your skin. This could also be used as a massage bar, though I'm working on a post for some of those as well. ;)


PUMPKIN SPICE SUGAR SCRUB:


WHAT YOU'LL NEED:

Optional:

Tools:

  • Mixing bowl

  • Stir Stick or spoon

  • Funnel

  • Airtight storage jars (THESE, THESE or THESE are adorable!)

  • Ribbons or stickers, however you'd like to decorate your jars (If you choose)


Pumpkin Spice Sugar Scrub

TO MAKE:


Measure out (by using your containers) and pour the amount of sugar wanted into your mixing container and spoonful by spoonful, add in your pumpkin spice or oil.

Continue mixing until everything in uniform in colour. (If you are only making a single batch for yourself, you can do this straight in your container, shaking it to mix)

Once you're happy with the consistency and scent, add the mixture into your containers using a funnel and a spoon.

Decorate the jars to your preference and you're all done!

TO USE:

Be sure to keep a clean dry spoon to get some of your mixture. (Introducing water into the mixture can create bacteria growth) Wet skin first, (shower or bath) take a spoonful or so and massage gently in a circular motion (toward the heart) with warm water. Your skin will be left feeling silky smooth!


A Little Info on our Ingredients!


pumpkin_pie_spice-product_1x-1403633522

PUMPKIN SPICE

This delightful blend has become an American tradition known for its ability to boldly flavor Pumpkin Pie during the Fall season, and is the revered aroma we commonly associate Thanksgiving with. Made with a blend of spices which produces a unique warm flavor, Pumpkin Pie spice is also used on cider, cookies, baked vegetables and more.
Contains: organic Cinnamon, organic Ginger, organic Nutmeg, organic Allspice, and organic spices. Salt-free.

- Mountain Rose Herbs - Purchase Here

pumpkin_seed_oil-product_1x-1403633528


PUMPKIN SEED OIL

Pumpkin seed oil is one of the most nutritional oils available, and is an excellent source of essential fatty acids, antioxidants, vitamins, and sterols. It contains Omega-3 and Omega-6 fatty acids, which are known to promote energy levels, brain function, and overall health and vitality. It also contains vitamins A and C, zinc, and other trace minerals and vitamins. Historically, pumpkin seeds (either the whole seeds or the pressed oil) have been used all around the whole for healing purposes.

- Mountain Rose Herbs- Purchase Here


If you'd like more of an orange tint you can try:


(Adding a few drops should do)

Pumpkin blends

HAPPY OCTOBER FRIENDS! ~ Have you got any all natural pumpkin recipes you would like to feature on our blog for the month of October? Please check out the Opportunities section of the blog or shoot The Herbal Healing Mama an email at: theherbalhealingmama@outlook.com

<3

If you make these or any of the recipes on the blog The Herbal Healing Mama would LOVE for you to send over some photos! If you have a small business (or not) we would be happy to share your made products on our social media pages and tag in links to your work!

I recommend Mountain Rose Herbs & Starwest Botanicals for all of your herbal healing needs! You can purchase any extra supplies over at Amazon.ca.
Images Edited using PicMonkey. Some of the links here are affiliate sites. & Please also see my disclaimer. Thanks Friends.