Showing posts with label how to. Show all posts

Sunday, October 26, 2014

DIY Whipped Coconut Oil Body Butter.

Coconut Oil is so amazing for our skin, one problem is, it's a little difficult to scrape out of the jar. Well, here is a simple solution so you can enjoy the nourishing benefits of coconut oil - anytime.

This recipe can be customized to fit any preference. Essential oils can be added for different scent options, & other nourishing oils and butters can be added as well. Some amazing options would be Vitamin E OilShea Butter or Cocoa Butter.

This is a pretty basic recipe with only 3 ingredients!

How to make your own Whipped Coconut Oil Body Butter


What You'll Need:


 I added 1/2 cup of coconut oil, 1 tbs of calendula infused oil and 4 drops of coconut scent. 

Tools You'll Need:


  • Mixing Bowl

  • Hand Mixer (Or better yet, a stand mixer) 

  • Spoon

  • Airtight container of choice


To Make: 


How to make your own coconut oil body butter


1. Scoop your coconut oil into your mixing bowl and add in any extra ingredients. (I added calendula infused oil & essential oils) 

--- I did this straight from the jar. While the coconut oil was solid, I think it would have turned out fluffier if I had of refrigerated it first. Some people like to melt everything together first, refrigerate it overnight and then mix it in the morning. (I'll definitely try this next time) 

2. Turn your mixer on high and beat for about 5 minutes, or until everything is as fluffy as you'd like it. 

--- You may have to scoop it all to one side to get it all evenly if you aren't making a big batch. 

3. Once you're happy with the consistency, carefully scoop it into your jar(s). 

VOILA! ~ Simple yet amazing body butter!

<3

If the done butter gets too warm it will melt back into an oil state BUT if it's kept too cold, it may become a little hard. It's best to keep it somewhere cool and not in direct sunlight. 


This was my very first attempt at a body butter. I don't think it turned out too bad. It definitely could have been worse. ^_^ I just wish it were a little fluffier, so that's something I will work on next time around.

Here are some pinnable images - I would love for you to share! <3

DIY Whipped Coconut Oil Body Butter 3a

Whipped Coconut Oil Body Butter - How To


DIY Whipped Coconut Oil Body Butter


Happy Creating! ~ <3


Have you made your own all natural body butter before? 

What are your favorite body butter ingredients or scent options? 

I recommend Mountain Rose Herbs & Starwest Botanicals for all of your herbal healing needs! You can purchase any extra supplies over at Amazon.ca. Images Edited using PicMonkey. Some of the links here are affiliate sites. & Please also see my disclaimer. Thanks Friends.


 Now Available On My Etsy! 

Whipped Body Butter Whipped Body Butter Etsy


Sunday, October 19, 2014

DIY Lip Scrub ~ All Natural

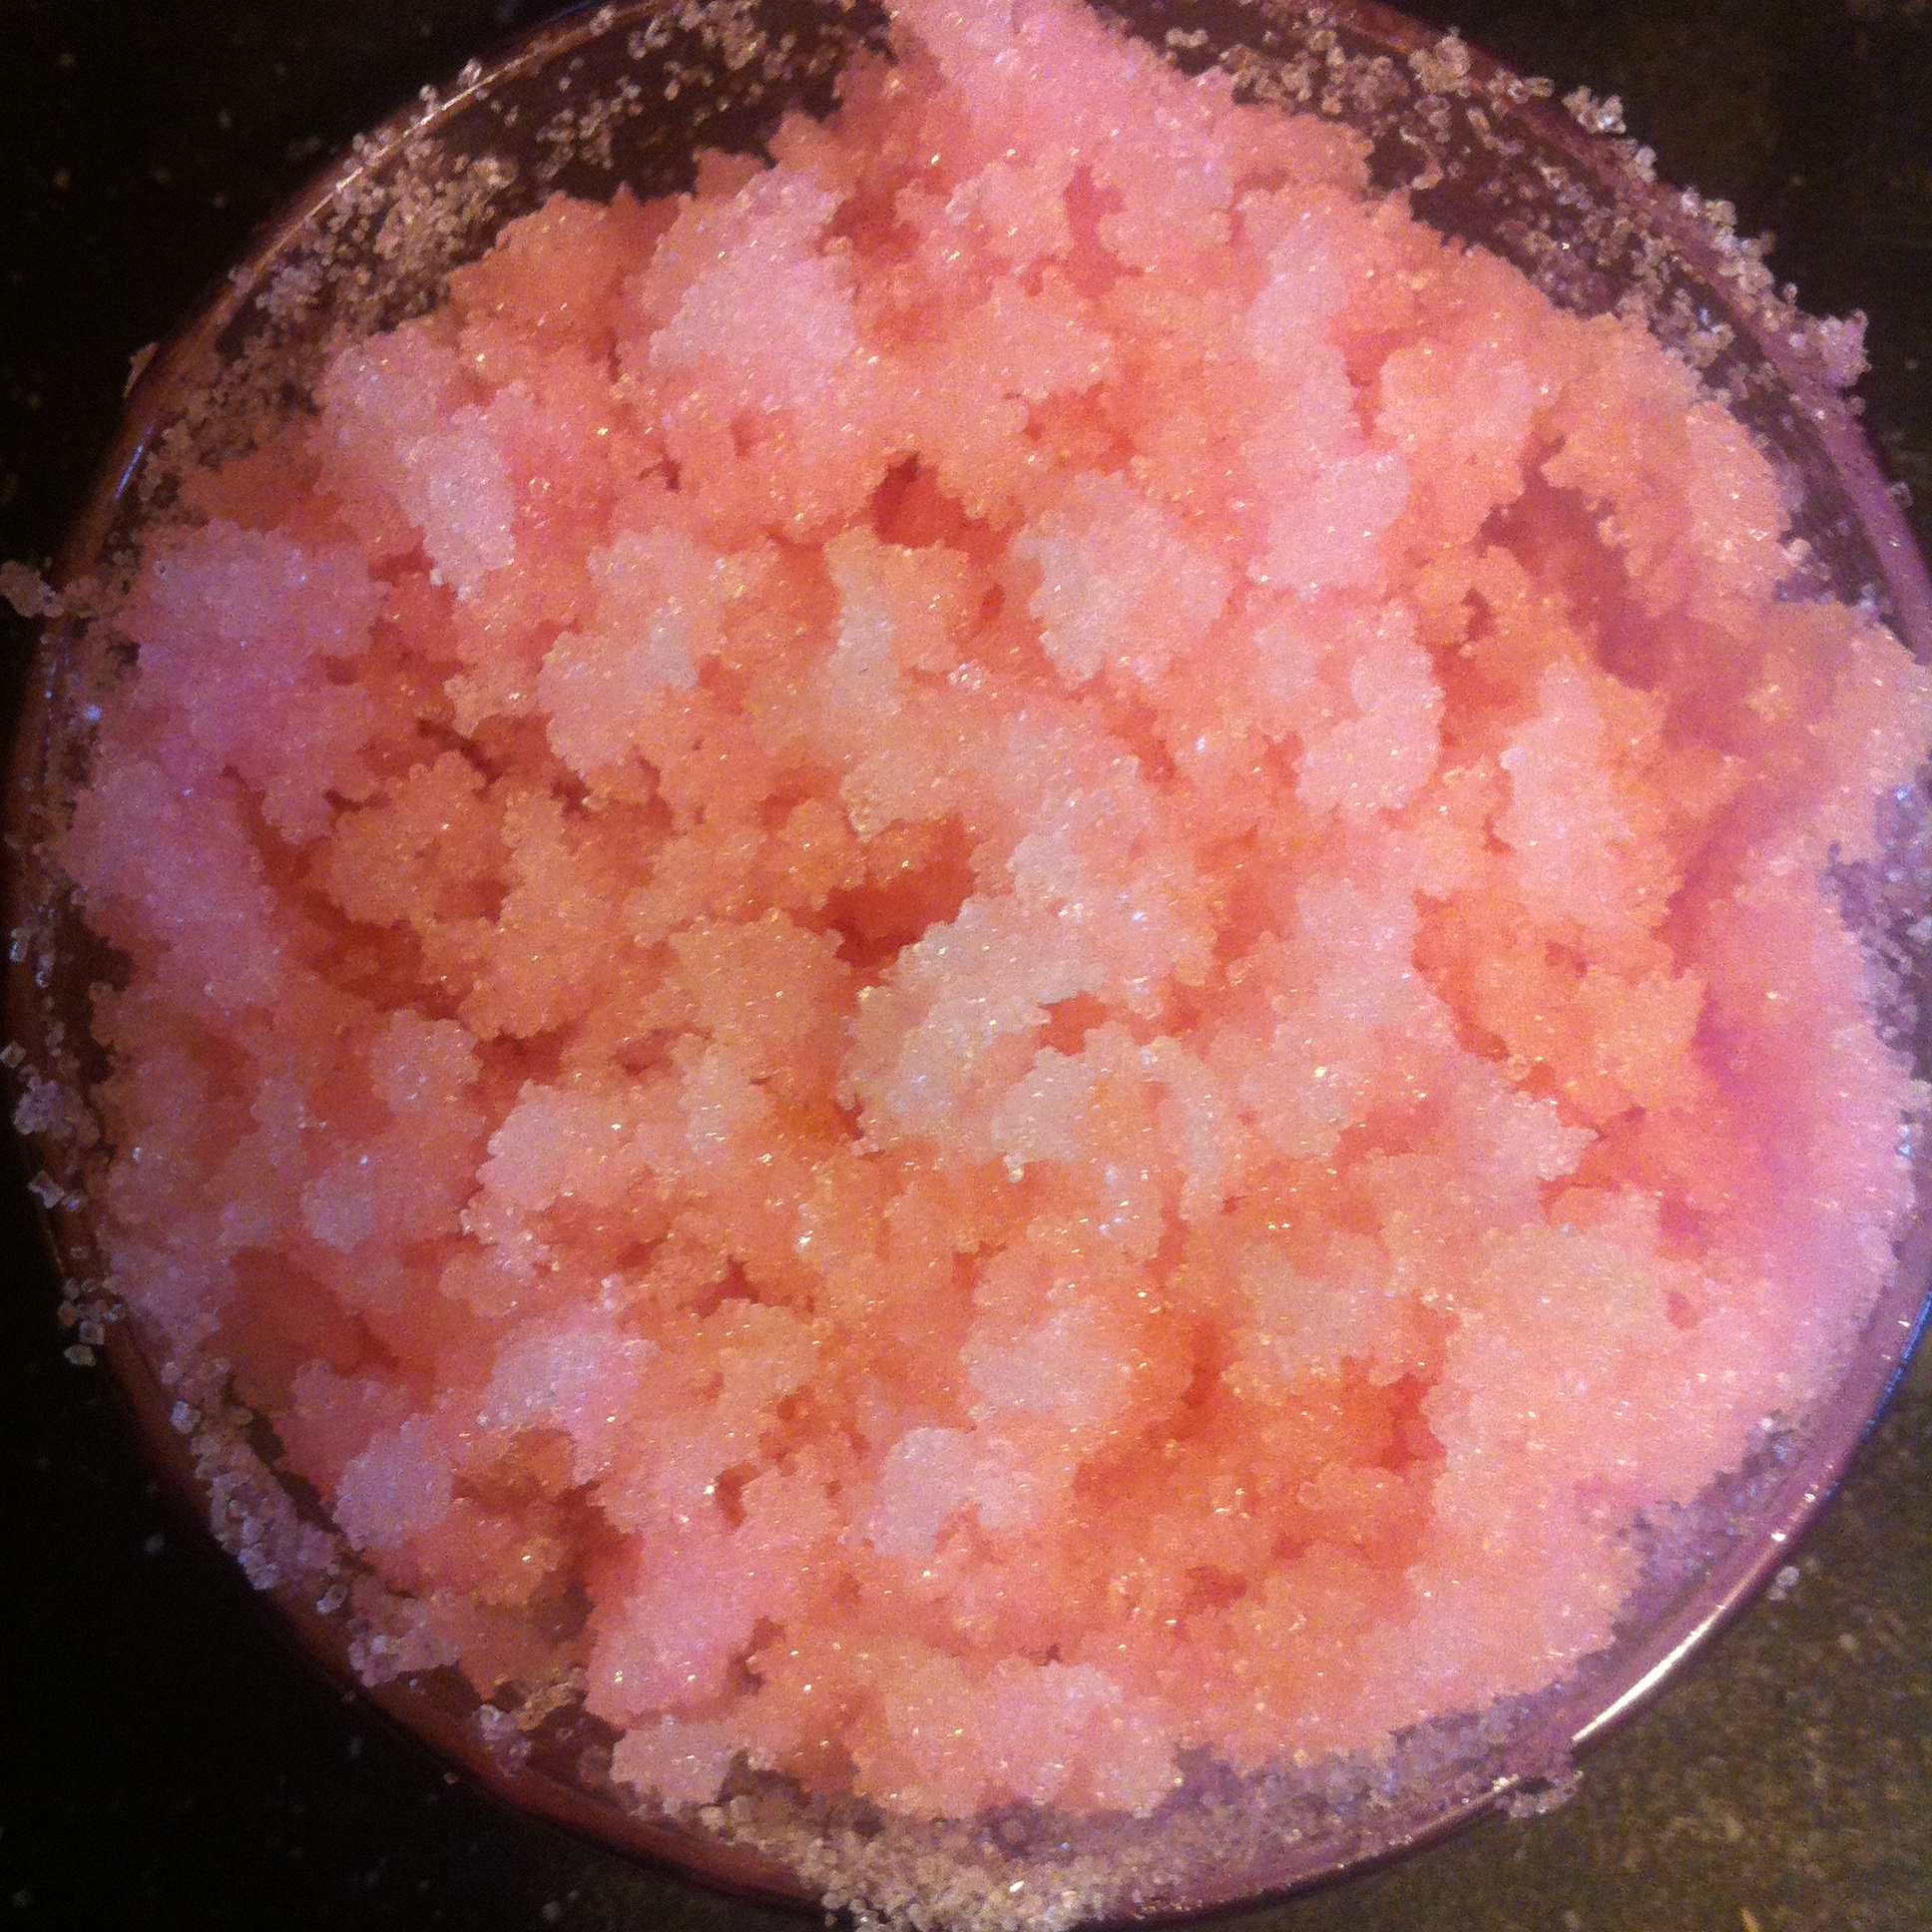
This simple lip scrub recipe is nourishing to your lips & can add a nice lip tint as well if you choose to add in a natural colorant. Lots of store bought products contain harmful chemicals & why would we want to put that on our skin and so close to our mouths? :/

DIY all natural Lip Scrub 1

What You'll Need:


Tools:

  • Melting pot, pan on the stove or double boiler

  • mixing bowl & spoon

  • Airtight container(s) for your finished product.


To Make:


For a 2 oz container I used:

  • 4 tbs sugar

  • 2 tbs of coconut oil (or half and half with one of the butters)

  • 1 tsp honey

  • 3 drops of peppermint oil

  • 3 drops of red colorant


Start by melting your coconut oil & butters. You can do this with a double boiler, meting pot, a pan, etc.

Remove from heat and add in your honey, colour & scent. (if using)

IMG_2665

With your sugar in a mixing bowl, slowly and evenly pour the melted mixture over your sugar, stirring until everything is consistently mixed. 

IMG_2666

Sometimes it's easiest to add more sugar afterwards until you're happy with the consistency.

IMG_2671

IMG_2672

Spoon into your containers, add a label if you so choose & enjoy!

IMG_2674

IMG_2691

Here is a FREE printable if you're using similar containers and would like to use a similar label:

HHM SUGAR HONEYSee the post on creating labels to put the labels into a collage for easier printing.

Happy Exfoliating! ~ <3

I recommend Mountain Rose Herbs & Starwest Botanicals for all of your herbal healing needs! You can purchase any extra supplies over at Amazon.caImages Edited using PicMonkey. Some of the links here are affiliate sites. & Please also see my disclaimer. Thanks Friends.

How to Create Product Labels Using PicMonkey!

How to create beautiful labels for your homemade products using PicMonkey!

I love PicMonkey! They offer so many free options as well as an extremely reasonable month to month premium membership for only $ 4.99 !! They even offer a FREE week trial for first time users.

As most of you know, I edit nearly all of my images using PicMonkey & I also use it to create all of my product labels. I thought I would share some tips and ideas for creating simple yet beautiful labels & I think I will also make a post with some printables from ones I've made in the near future. (Let me know if that's something of interest, and what you would like to see)

Onto some simple tutorials:

Head on over to http://www.picmonkey.com/

Start by selecting the design option and choosing the shape of canvas you would like to start your label as.

Create Labels on Picmonkey 1

I chose a square to start these labels.

Next select any canvas colour your heart desires.

Create Labels on Picmonkey 2

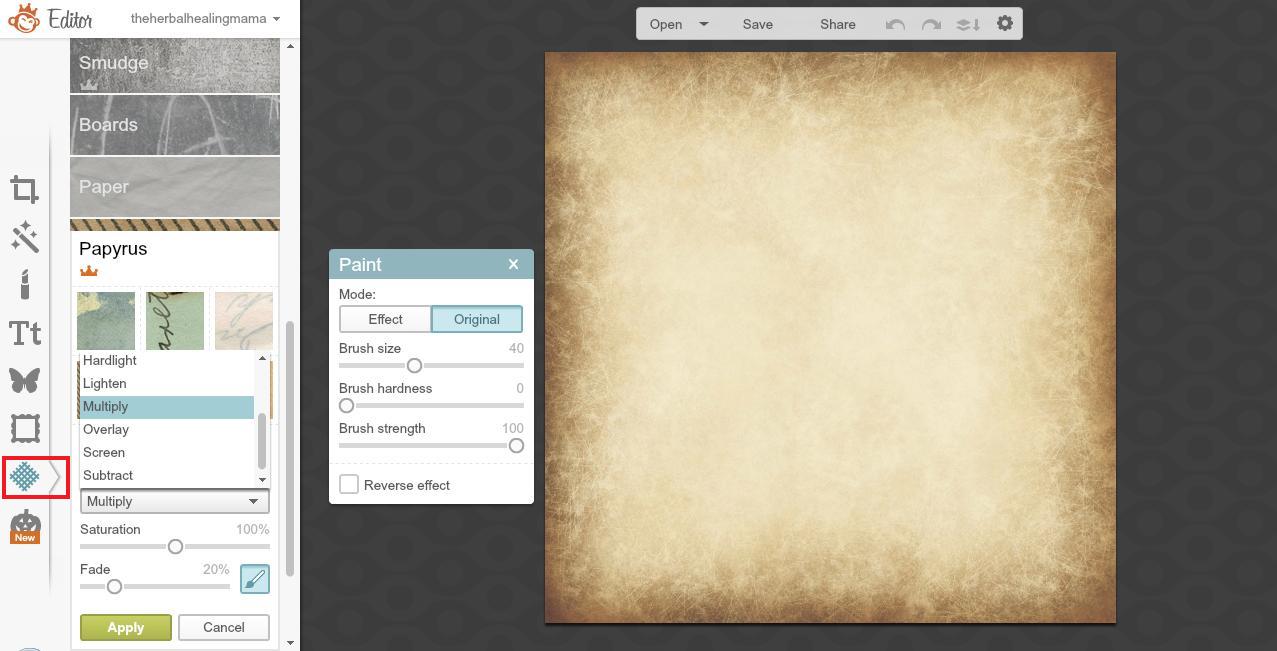
White is basic and you can then choose any effects or overlays to put on top of it. You can also change how the overlay looks by going into the options menu.

Create Labels on Picmonkey 3

I stuck with a plain white canvas for my first example. Next you will go into the 'sticker' section, which is currently shaped like a butterfly on the side menu. You can choose any shape you like, but I chose one from the 'labels' list. You can change the colours to anything you'd like.

Create Labels on Picmonkey 4

Now you can go into the 'font' menu on the side panel and pick your favourite(s). Type in what you'd like it to say and you can move the font bubbles around or change the size, colour and fade as well.

Create Labels on Picmonkey 5

There is your first label! TAH-DAH! - Don't forget to hit save when you're done!

Lavender Sugar ScrubNext, we'll create more of a custom option. I chose to do this one in a circle but there are options to make it a square etc.

Start by deleting the 'sticker' label we chose to use. To do this, click on the label and select the delete option.

Create Labels on Picmonkey 6

Going back into the stickers option on the side panel and into 'geometric' select a circle. Pull the circle to fit up and around your text by dragging the slider bar. Next, right click the circle and hit 'send to back' this will put the circle behind your text.

Create Labels on Picmonkey 7

Depending on the colour you've chosen, you may have to change your font colour so you can see it on top of the circle. For this, I wanted a black frame around a white label so I added a white circle and hit the 'send backward' option by right clicking. This will push it behind your text but not behind the black circle. (You can always do this the simple way and create your shape first and then do the text last, I just wanted to show the options)

Create Labels on Picmonkey 9

You may have to move your shapes out of the way as Picmonkey doesn't have a layer list and sometimes they are hard to select. To change your font colour, reselect it, highlight it and move the colour slider until you're happy. I went with plain black for these.

Create Labels on Picmonkey 8

Once everything is back in line, go back into the sticker menu and select from the 'labels' again. I chose a dotted circle. Pull the shape using the slider until it's where you want it.

Create Labels on Picmonkey 10

You can choose to embellish this with little stickers etc. However you like. & There you have it, another way to create a label! - Don't forget to hit save when you're done!

HHM Sugar scrubNow, if you want to get a little fancy, you can select to ombre the background by going into the 'seasonal' section at the bottom of the list and going into the 'sweethearts' section.

Create Labels on Picmonkey 11

You can also put on an overlay. (Similar to the top, but there are other ones to choose from in the different seasonal sections.) To use these, go into 'heart cutouts' but change the size to 0%.

Create Labels on Picmonkey 12

Now, if you go into the frame section of the menu bar, you can choose a 'shape cutout'. Stars, Hearts, Circles, Squares etc. This is an easy way to create a shape for a label.

Create Labels on Picmonkey 13 Create Labels on Picmonkey 14

And there is a third way to create a fancy label for your products! - Don't forget to hit save when you're done!

Lavender Rose UntitledxxNow, to print them, I find the easiest way is to create a collage - also using PicMonkey! - Go back into the start menu. You can do this from hitting the 'x' on the upper left corner. and then select collage.

Create Labels on Picmonkey 15

Choose your labels that you just created. And then go into 'square deal' on the side menu. Choose however many you'd like to have on one sheet of paper. (This will depend on how large or small you'd like the labels to be.) You can play around with this option. I also slide the shape of the entire box to be closer to that of a standard 8.5 x 11 sheet of paper since I print at home.

Create Labels on Picmonkey 16

Drop and drag your images or select 'auto fill' at the top.

Create Labels on Picmonkey 17

Once you're happy, save your collage and then print your beautiful new labels out!

You can purchase blank sticker sheets HERE.


Most of the examples here are using a premium membership. If you decide to sign up for PicMonkey Premium through my link - I earn a small commission. I would appreciate it greatly.


I hope some of you found this useful! ~ <3

picmonkey_728_90

Images Edited using PicMonkey. Some of the links here are affiliate sites. & Please also see my disclaimer. Thanks Friends.

Saturday, October 18, 2014

Sugar Scrub Cubes! ~ DIY all natural!

This recipe can be as plain or fancy as you'd like. All depending on your preferences. You can add in bits of herbs, natural colourants, different butters and oils etc. This post will be a down to the basics, as simple as possible post & later I will add more extravagant variations of the same basic recipe.

I find these incredibly more handy then a regular sugar scrub, as you would normally have to carry a scoop with you to the shower all the while being careful not to get water into the rest of the mixture. With these, you just bring a single cube along with you. No need for messes or containers!

I see a lot of these with a melt and pour soap base added. I don't have things like this on hand and so, if you're like me - you may want a recipe without all the fancy stuff! - Just your basic exfoliating sugar scrub - in cute little cubes!

make your own sugar scrub cubes

What You'll Need:


BASICS:

OPTIONAL:

Tools:


  • silicone mold ( I used one similar to THESE)

  • mixing container & spoon / spatula.


To Make:


For the 15 cavity mold I used to create these I used approximately

  • 2 1/2 cups of sugar

  • 1/4 cup melted coconut oil ( you can mix the butters into this measurement if you're going to use them )


Melt your butters and oils first. In a big mixing bowl, pour in your amount of sugar. Slowly pour your melted oil in, mixing constantly.  You want this to be spread evenly. You may not need all of the measured coconut oil.

I spritzed mine with distilled water. I find this helps hold everything together. (You will want to be sure these are fully dried before sealing these up though, as the water kept damp would create a bacteria issue)

Mix ingredients until you have a similar looking consistency as what is shown below. When your spoon is able to make a good firm indent without your mixture falling back, then you've got the right consistency.

sugar scrub cubes Spoon your mixture into your molds and push down firmly with a spoon or your fingers. You don't want any air pockets in between these or else they won't stick together properly.

sugar scrub cubes DIY

Leave your mixture in the molds until they have completely hardened. Trying to pop them out early will break them. This is where patience comes into play! ;) I left mine sitting for 3 days. You could also keep these in the fridge to solidify. As long as they aren't in a humid space.

Once you can press firmly on the tops of them and they seem to be completely solid, carefully pull the tray apart from side to side to start releasing them. Push from the bottom of the mold until they pop up and out.

sugar scrub cubes

You could let them air dry another day or so.

Adorable Right!? Now you can package them up any way you choose or store them in an airtight jar. We decided to wrap these ones in cellophane with a cute little ribbon. (Thanks Richelle for the brilliant idea)

Sugar scrub cubes packaged

To Use:

Bring a single cube with you into the bath or shower. With wet hands kneed the cube until it begins to crumble. Massage gently in circular motions where you need a little exfoliation. Always moving toward the heart. This helps regulate blood flow.

Happy Exfoliating! ~<3

Have you got a favourite sugar scrub recipe you make at home?


I recommend Mountain Rose Herbs & Starwest Botanicals for all of your herbal healing needs! You can purchase any extra supplies over at Amazon.ca. Images Edited using PicMonkey. Some of the links here are affiliate sites. & Please also see my disclaimer. Thanks Friends.