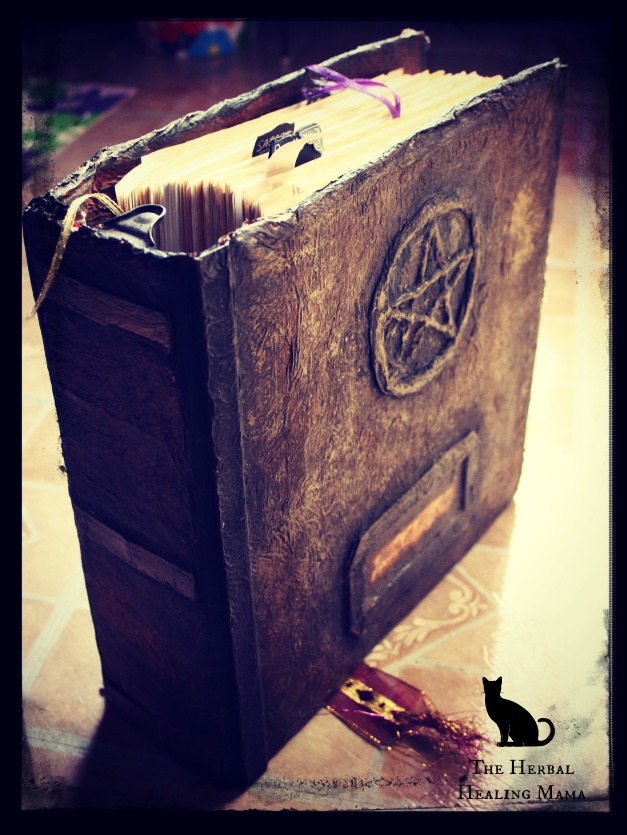
My son and I created this antique looking Book Of Shadows quite a few years ago and I thought since it's spooky season, why not share the easy DIY here with you! <3

What You'll Need:
- Old Book or Binder ( We made this one out of a binder)
- Paper Towel, Cheesecloth, Toilet Paper, etc.
- White Glue or Modge Podge
- Foam brush or paint brush
- Glue Gun / Cardboard / Print Outs or Halloween things to stick to the book.
- Acrylic Paints ( We used black as a base and dry brushed golds and browns into the top)
- Matte Clear Coat Spray (Or a final layer of Modge Podge)
- Tea or coffee (if you are staining pages to look old)
- Newspaper or something to cover your workspace.
To Make:
Choose your book and start with thin strips of paper towel (or whatever you chose to use) I like the paper towel the best because it's strong enough not to tear but wrinkles up easily to look like old worn leather.
Paint a small patch of glue on your book and lay the paper towel over it, then paint glue again over the paper towel. Continue this until your book is entirely covered. - You may have to do one side at a time and allow to dry in between or you may end up with a sticky mess. (You could try opening the binder and laying it flat but we also wrapped the paper towel cover into the inside of the book right up until the binder rings. Also- If you let it harden this way, you'll have a hard time closing it later. It's probably best to do one side at a time.)
You can add extra wrinkles, cardboard shapes, paper towel shapes, glue gun shapes, you could even stick little rubber halloween decorations to the book and then do a light coat of the paper towel and glue mixture over top. - The pentagram on ours was made from rolled up paper towel but I think a glue gun may make a more precise shape. The title cut out at the bottom is cardboard and a printout. The side of the binder we put cardboard rectangles along it to give it more definition. Originally we had some really neat rustic looking ornate corners on the front, which were from the scrapbooking section at the dollar store but they fell off somewhere along the way.
Once the entire book has dried, you can paint it however you like. We did a base coat of black and then using a dry brush, dipped into golds and browns, wiped extra paint off onto a paper towel and then the lightly over the top bumps and embellishments on the book.
Once you're happy with the paint and it's finished drying, you can clear coat it with a matte spray or an extra coat of glue or modge podge.
If you are adding your own pages and want them to look old and spooky you can stain them with tea bags or coffee. Make a STRONG mixture in a heatproof bowl & dab the pages with tea bags. Lay them out to dry.
Finally, You can add feathers, twine, ribbons, page tags, or any such things your creative mind can think of.
We added some pockets on the inside as well for extra bits of paper etc. To do this, lay a few sheets of paper towel onto a cellophane wrapped cookie tray (so it doesn't stick) and paint with glue like you did the book. leave the sides flatter than the middle so it's easier to glue on later. Once it's dry, paint it the same as you did the book and glue along the bottom and sides leaving the top unglued. (I'll try to add a few photos of the making of)
Everyone who has seen the book sitting on our shelf says: "Oh, wow! that book must be really old!"
I love how it turned out and it's extra special because it was a project my son and I made together. We have had this book around for about 6 years and it's still as great looking as day 1, everything has held us really well.


HAPPY CRAFTING!! ~ <3
You can purchase any extra supplies over at Amazon.ca. (Affiliate link)


![[UNSET]](https://theherbalhealingmama.files.wordpress.com/2014/10/unset.jpg)


![diy-floating-ghost-5_thumb[2]](https://theherbalhealingmama.files.wordpress.com/2014/10/diy-floating-ghost-5_thumb2.jpg)


